
Christmas cookie decorating party ideas work best when the baking is finished before guests arrive and the table is set up for decorating, drying, and packing. Bake and cool cookies ahead, choose three simple shapes, use royal icing, protect the table with parchment and sheet pans, put sprinkles in ramekins, create a drying rack zone, and send cookies home in bakery boxes.
A cookie decorating party is at its best when the host is not still pulling hot trays from the oven. The fun happens at the table: icing colors, tiny details, sprinkle bowls, practice lines, and the proud moment when a finished cookie survives the trip home.
For Christmas cookie decorating party ideas that actually work, think in stations rather than recipes. Cookies, icing, tools, snacks, drinks, drying racks, photo space, and take-home boxes each need a place, especially when kids and adults are decorating at the same time.

Top Recommended Products


You Might Also Like These Blog Posts
- 25 Christmas Cookie Party Hosting Ideas for Easy Hosting
- 25 Hot Chocolate Bar Ideas for Easy Hosting
- 25 Christmas Movie Night Snack Ideas for Easy Hosting
- 25 Holiday Brunch Ideas for Easy Hosting
- 25 Holiday Cocktail Buffet Hosting Ideas for Easy Hosting
1. Cookies Baked and Cooled Before Guests Arrive
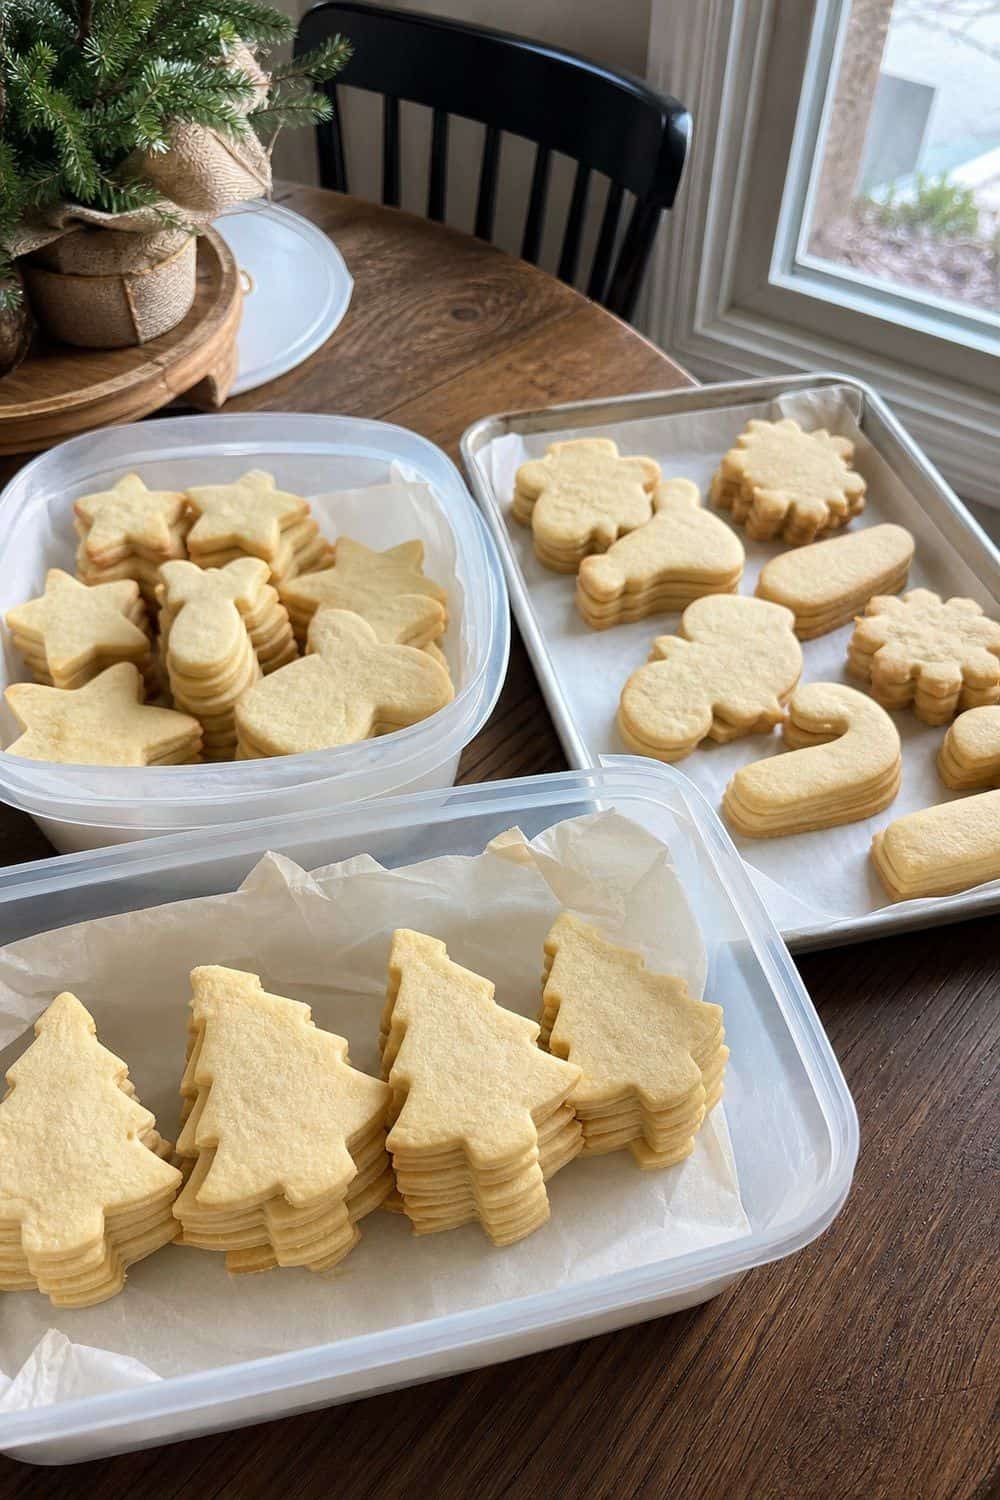
Cookie blanks need to be completely cool before the decorating begins. Warm sugar cookies, gingerbread, or shortbread can soften, bend, and smear icing before guests have even chosen a color. Airtight cookie containers let you bake the night before and keep each shape protected until party time. Stack sturdy cookies with parchment if needed, but avoid crowding delicate cutouts that may lose corners. This is the clearest difference between a decorating party and a baking party. Guests should arrive to blank cookies ready for icing, not a kitchen full of timers and hot pans. Bake a few extra cookies for breaks and mistakes.
2. Three Simple Cookie Shapes
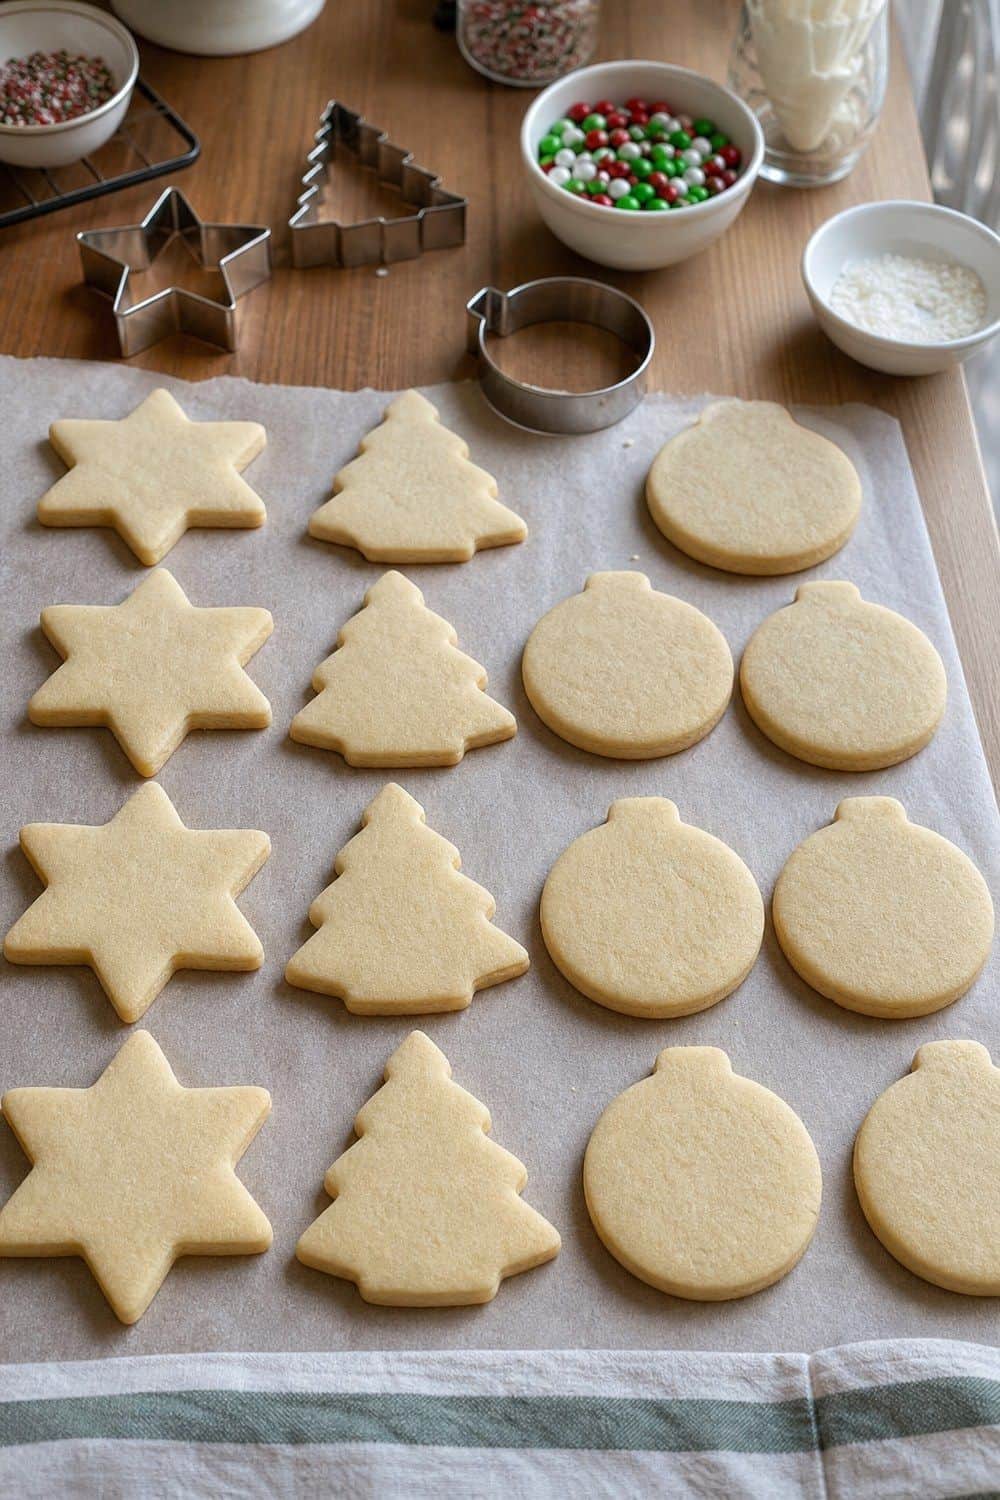
Three sturdy shapes make the table easier for everyone. Stars, trees, circles, mittens, ornaments, and gingerbread people offer plenty of creative room without creating twenty different decorating problems. A Christmas cookie cutter set helps keep the shapes related, but you do not need to use every cutter in the box.
Pick two or three that bake evenly and have enough surface area for icing. Thin antlers, tiny points, and complicated silhouettes may look charming before baking, then break during decorating or packing. Save fragile shapes for a smaller adult project. With fewer shapes, guests can compare ideas and try variations. A table full of trees, stars, and rounds often looks more festive than a chaotic tray of every cutter you own.
3. Royal Icing for Take-Home Cookies
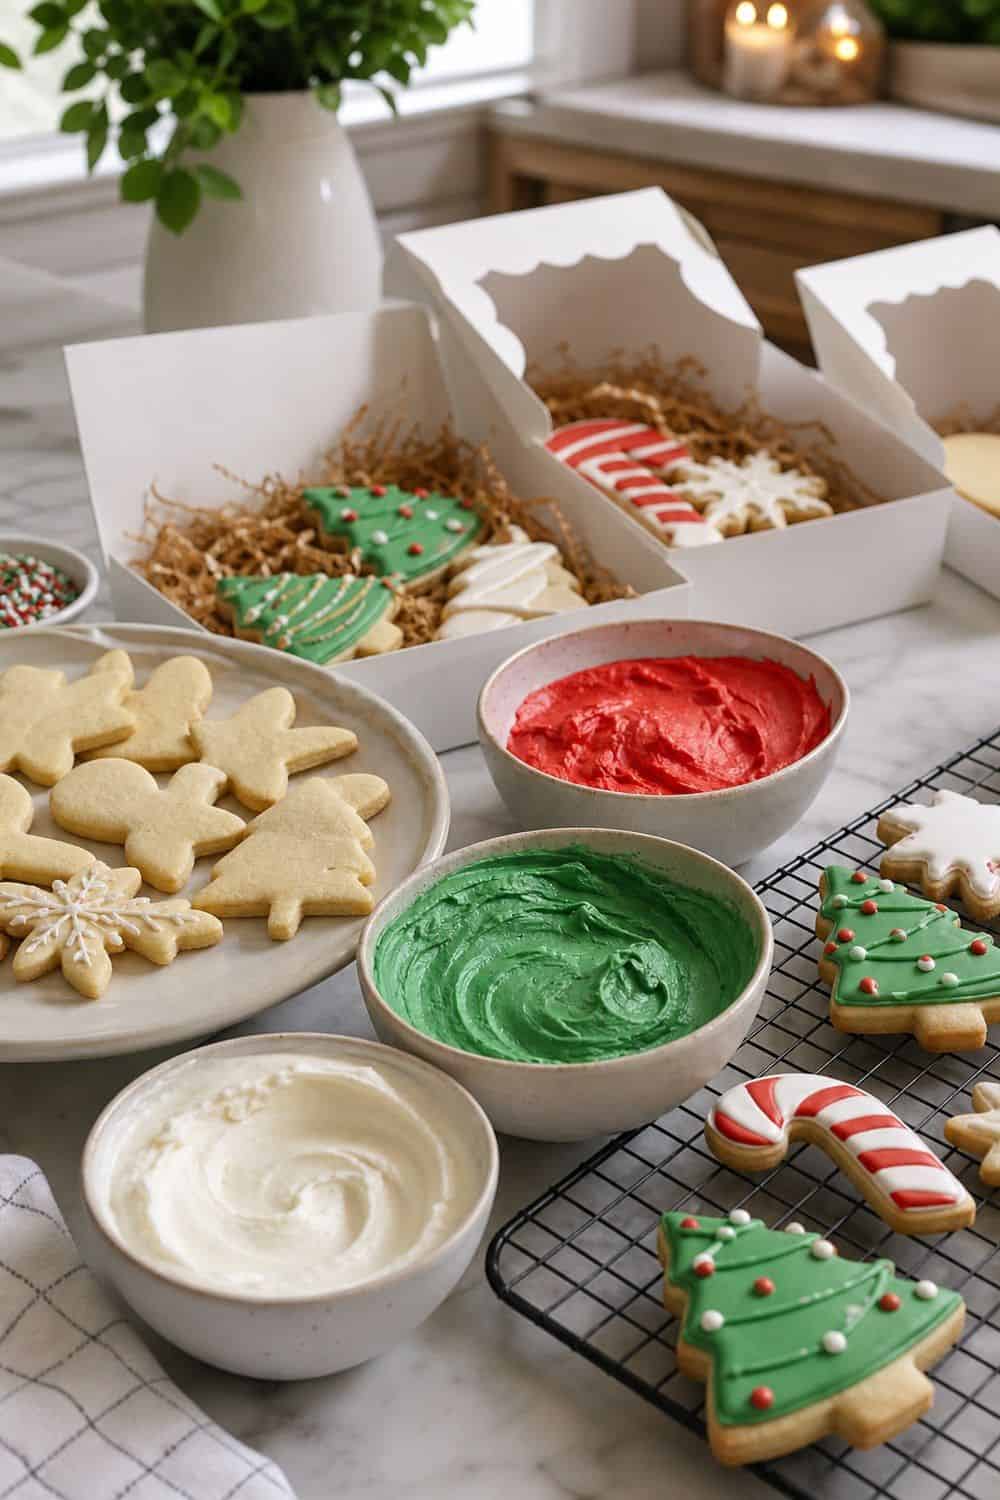
Take-home cookies need icing that firms up. Royal icing is useful because it dries harder than buttercream-style frosting and gives decorated cookies a better chance of surviving the ride home. Royal icing mix keeps the setup easier when you are hosting, especially if you want consistent batches for outlines, details, and simple fill areas. Mix only a few colors so the station stays manageable. Soft frosting still has a place if guests are eating cookies immediately, but it is harder to box and layer. For decorated cookies that travel, royal icing is the safer party choice. Allow real drying time before packaging.
4. Separate Piping and Flooding Icing
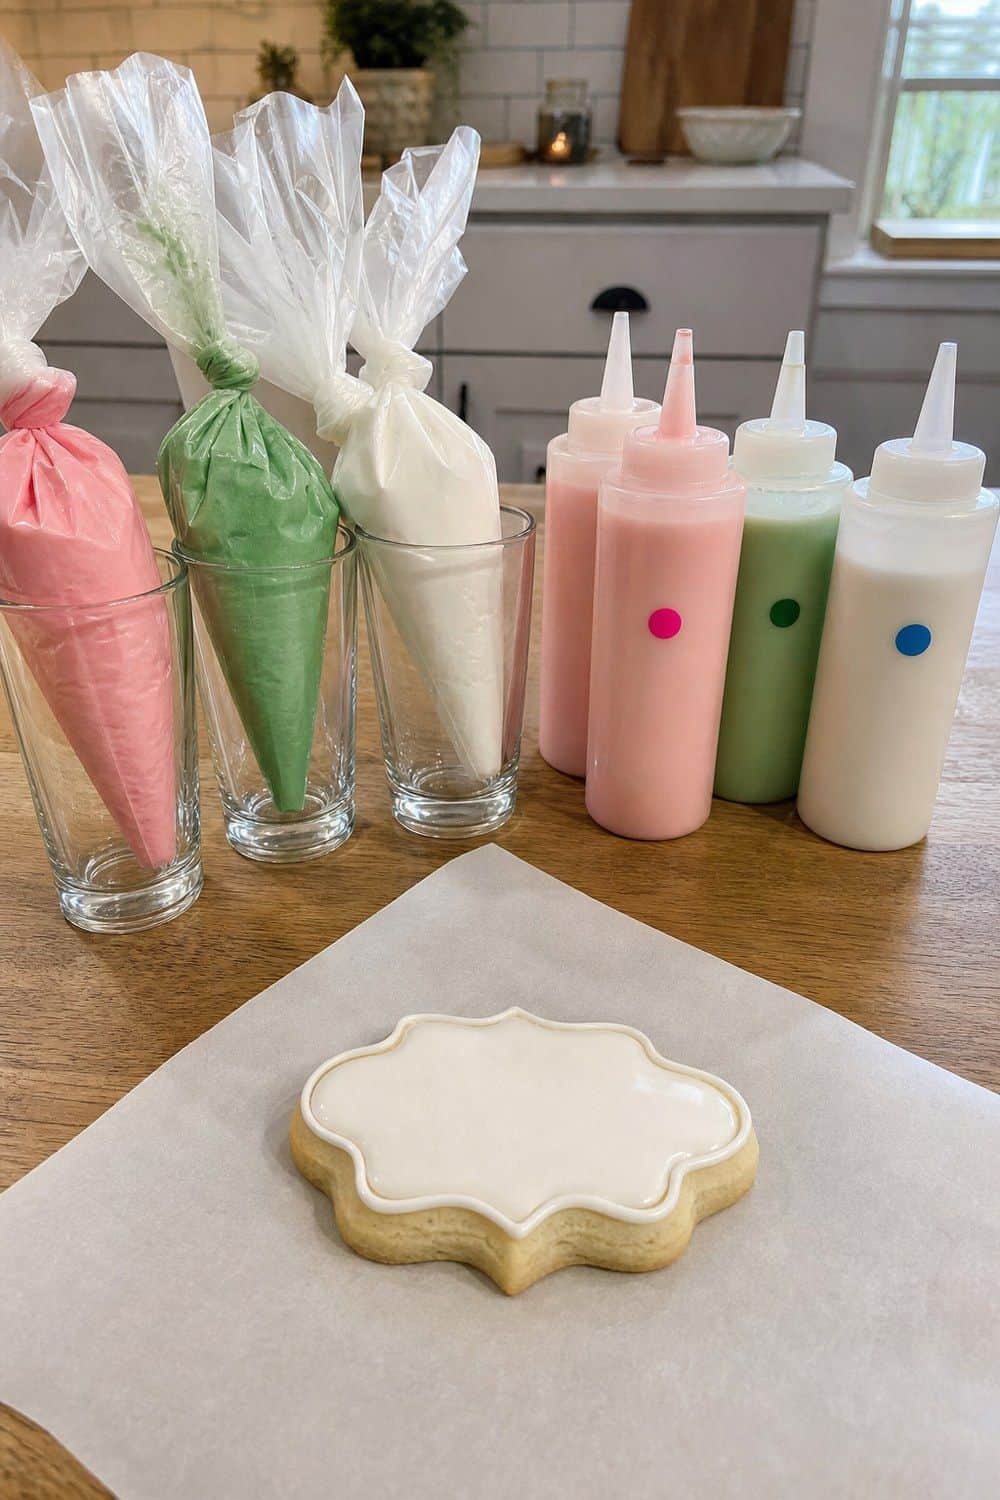
Outline icing and fill icing do different jobs. Firmer icing draws borders, names, dots, and small details; looser icing fills larger spaces and settles into a smoother surface. A squeeze bottle set is helpful for flooding icing because beginners can control the flow without handling an open bowl and spoon. Use bottles for looser icing, then keep firmer icing in piping bags. Label the bottles by color or consistency so guests do not flood a cookie with outline icing and wonder why it will not spread. Test one cookie before guests arrive.
5. A Small Color Palette
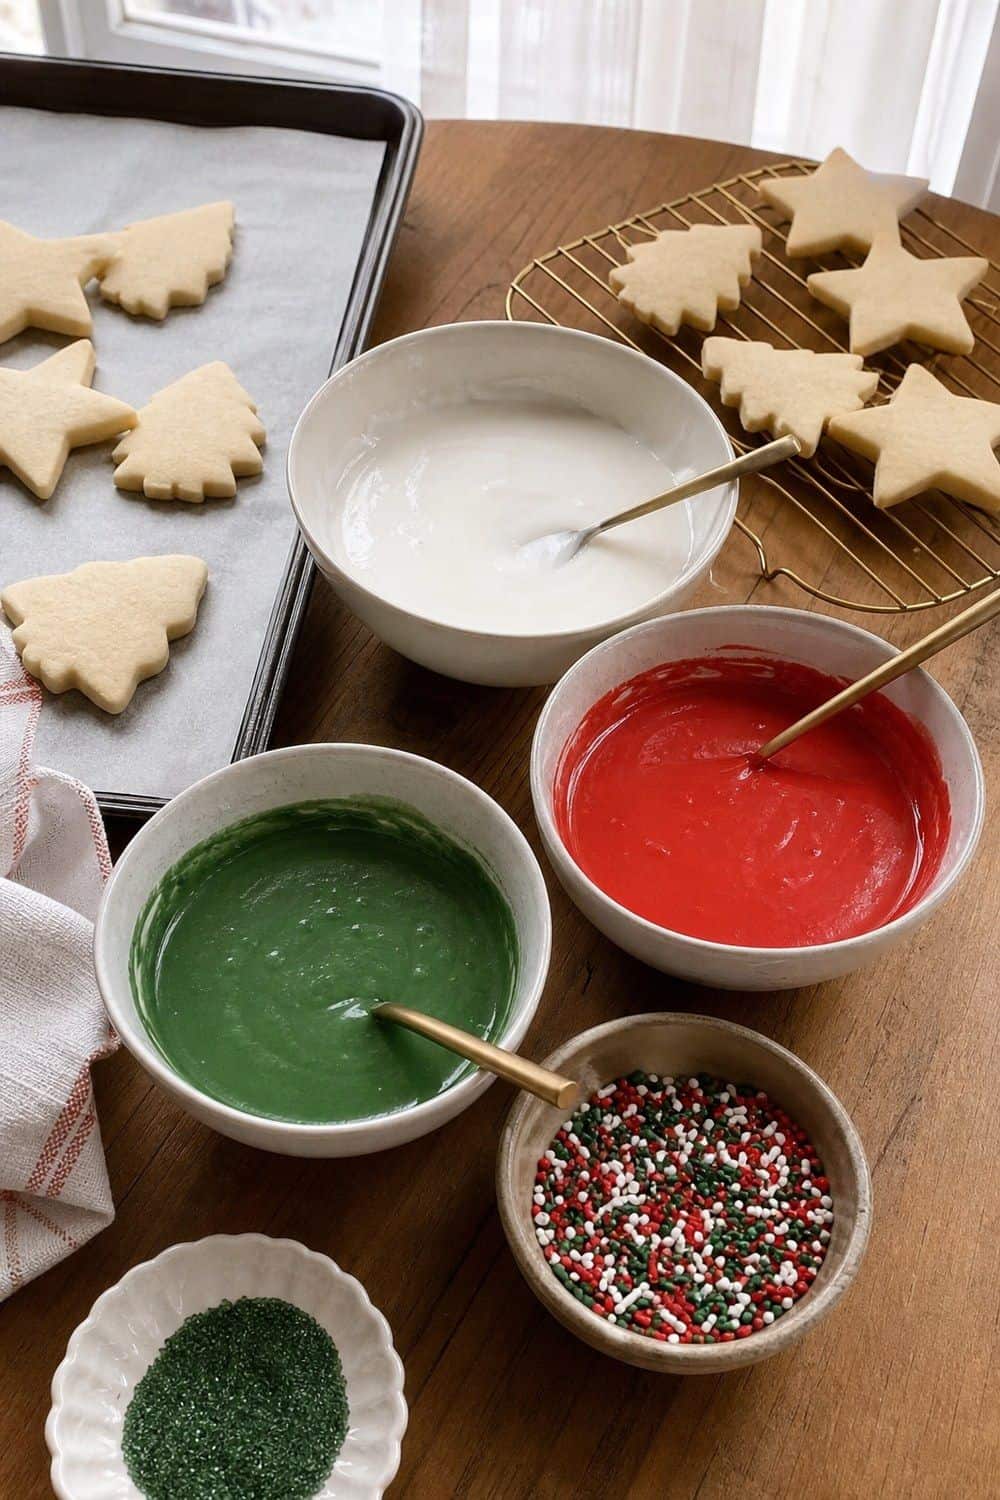
Too many icing colors can turn a cheerful table into a mixing station. Two or three colors plus white are usually enough: red, green, and white; blue, white, and silver; or brown, cream, and cranberry. Gel food coloring is better for royal icing because it adds strong color without thinning the icing the way liquid color can. Start with a tiny amount, especially for deep red or green. A small palette also makes the finished cookies look more cohesive in photos and boxes. Guests can still create variety with sprinkles, lines, marbling, and shapes. Keep one bowl of plain white icing available.
6. Piping Bags Filled Before the Party Starts
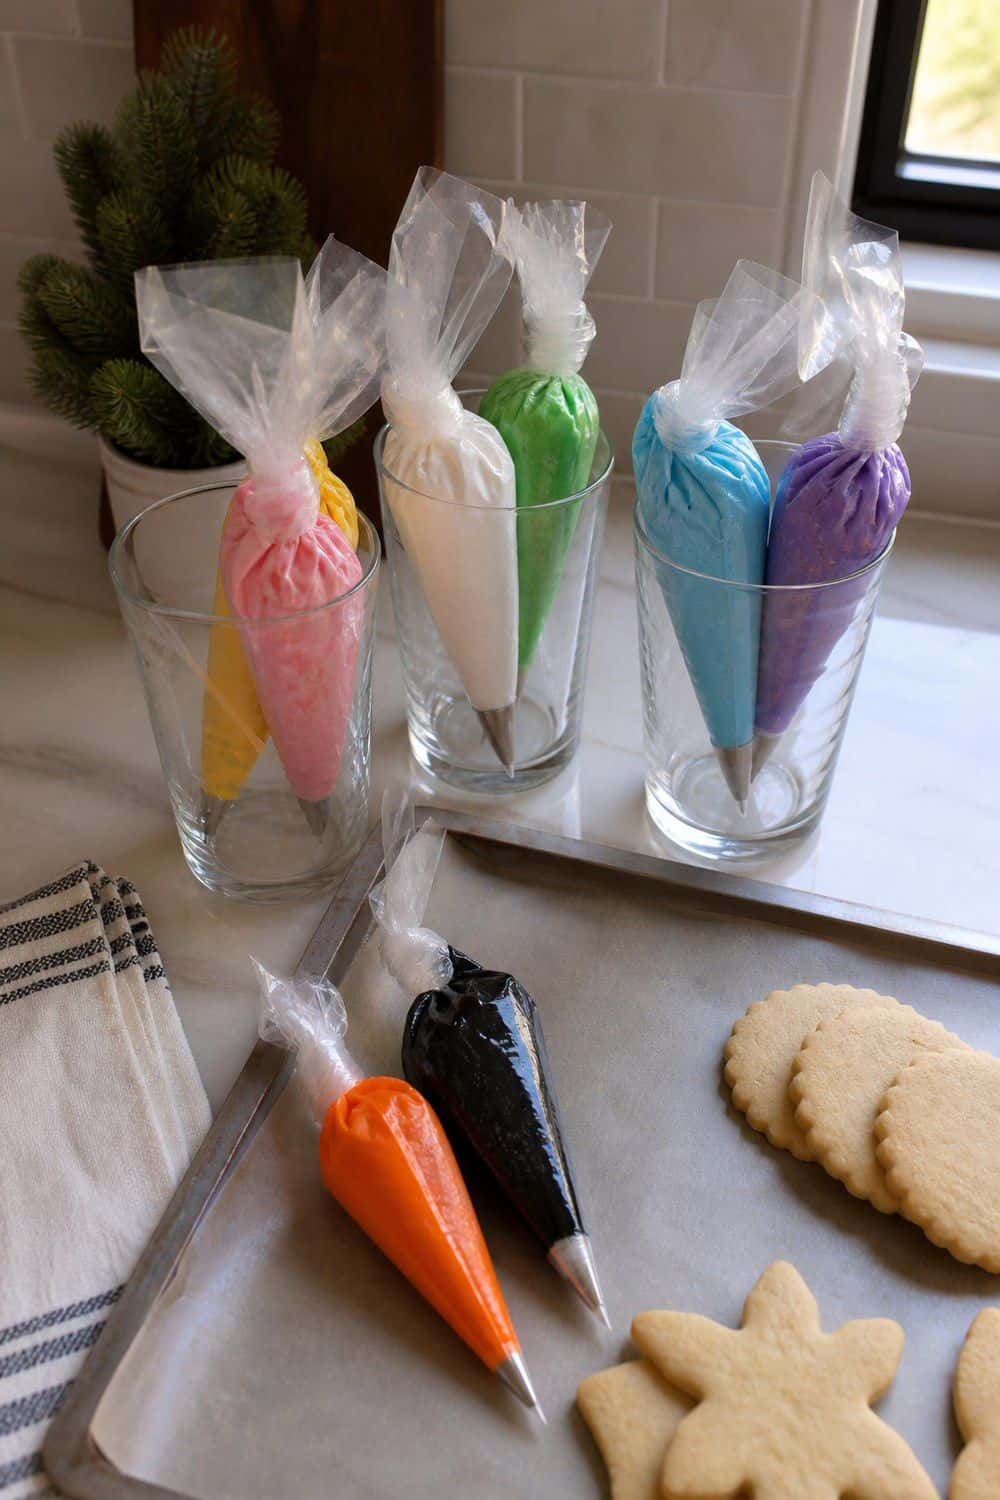
Filling icing bags during the party is slow, sticky, and surprisingly stressful. It also pulls the host away from helping guests with clogged tips, drying cookies, or box setup. Disposable piping bags can be filled, twisted, tied, and set tip-down in cups before anyone arrives. Use small amounts of icing in each bag so younger guests can hold them comfortably. Keep the bag openings small at first. Guests can always snip a slightly larger hole, but an oversized opening turns lines into puddles. Set extra bags aside for refills instead of putting every color on the table at once.
7. Tipless Bags for Beginner Lines
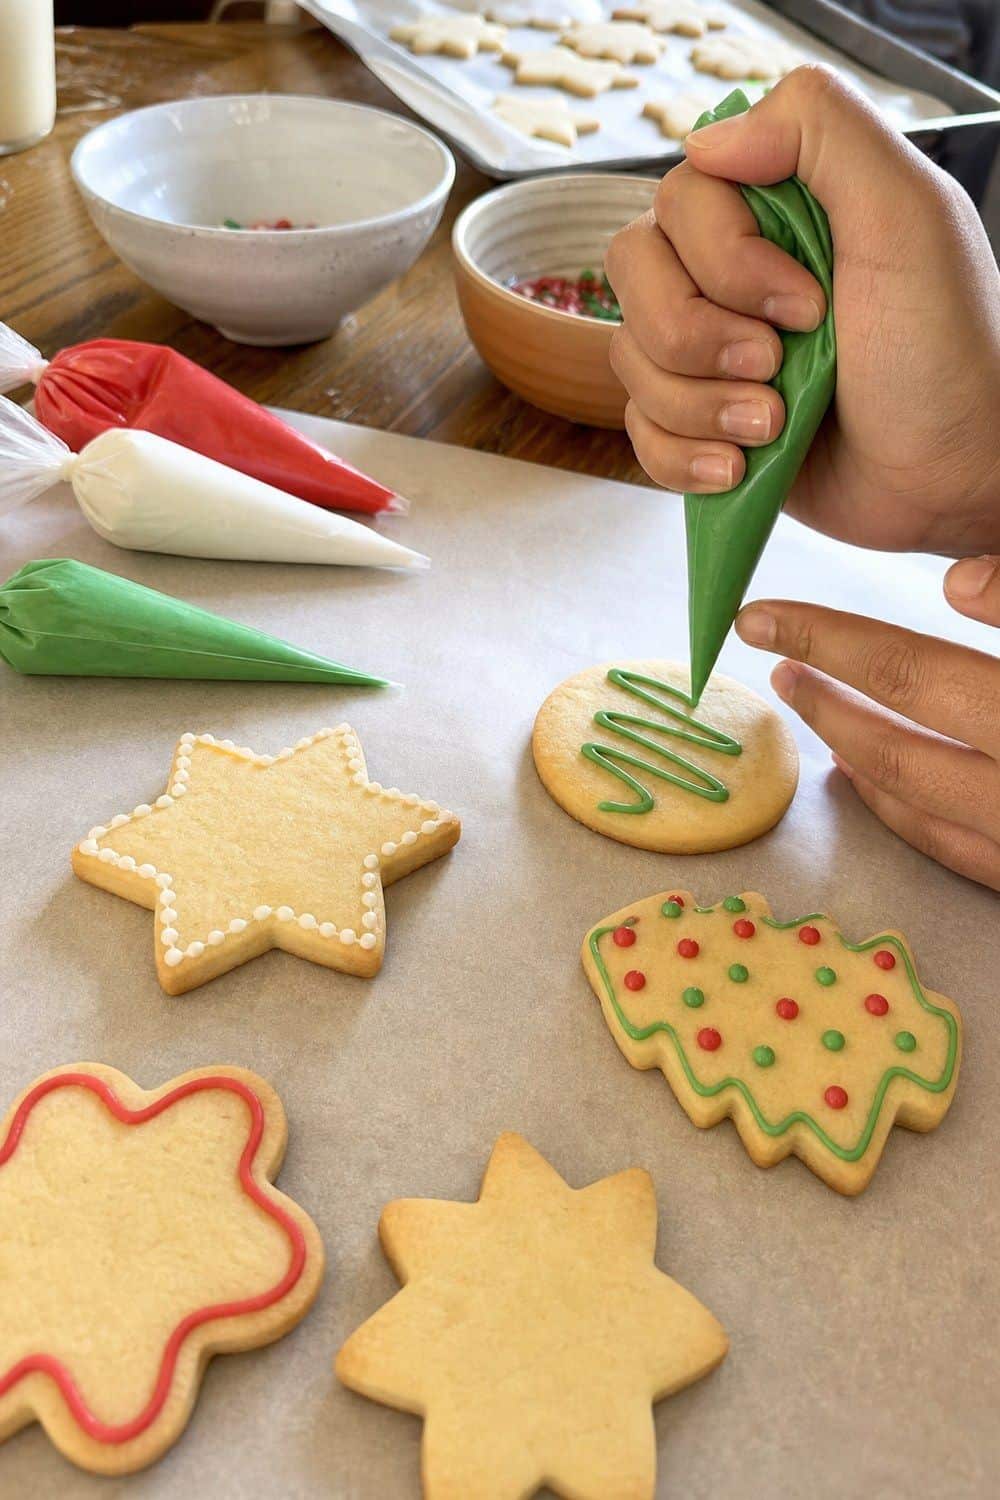
Beginner decorators do not always need metal tips and couplers. Tipless bags let guests cut a tiny opening for outlines, dots, zigzags, names, and simple borders. Tipless piping bags are especially useful for a mixed-age cookie decorating setup because they simplify the tool table.
There are fewer pieces to lose, wash, or accidentally drop into icing. Cut the first opening smaller than you think. A tiny snip gives better control; if the icing barely moves, trim again. These bags are not perfect for every effect, but they are enough for most party decorating. Save specialty tips for the adult detail table or older kids who want a challenge.
8. A Few Small Piping Tips
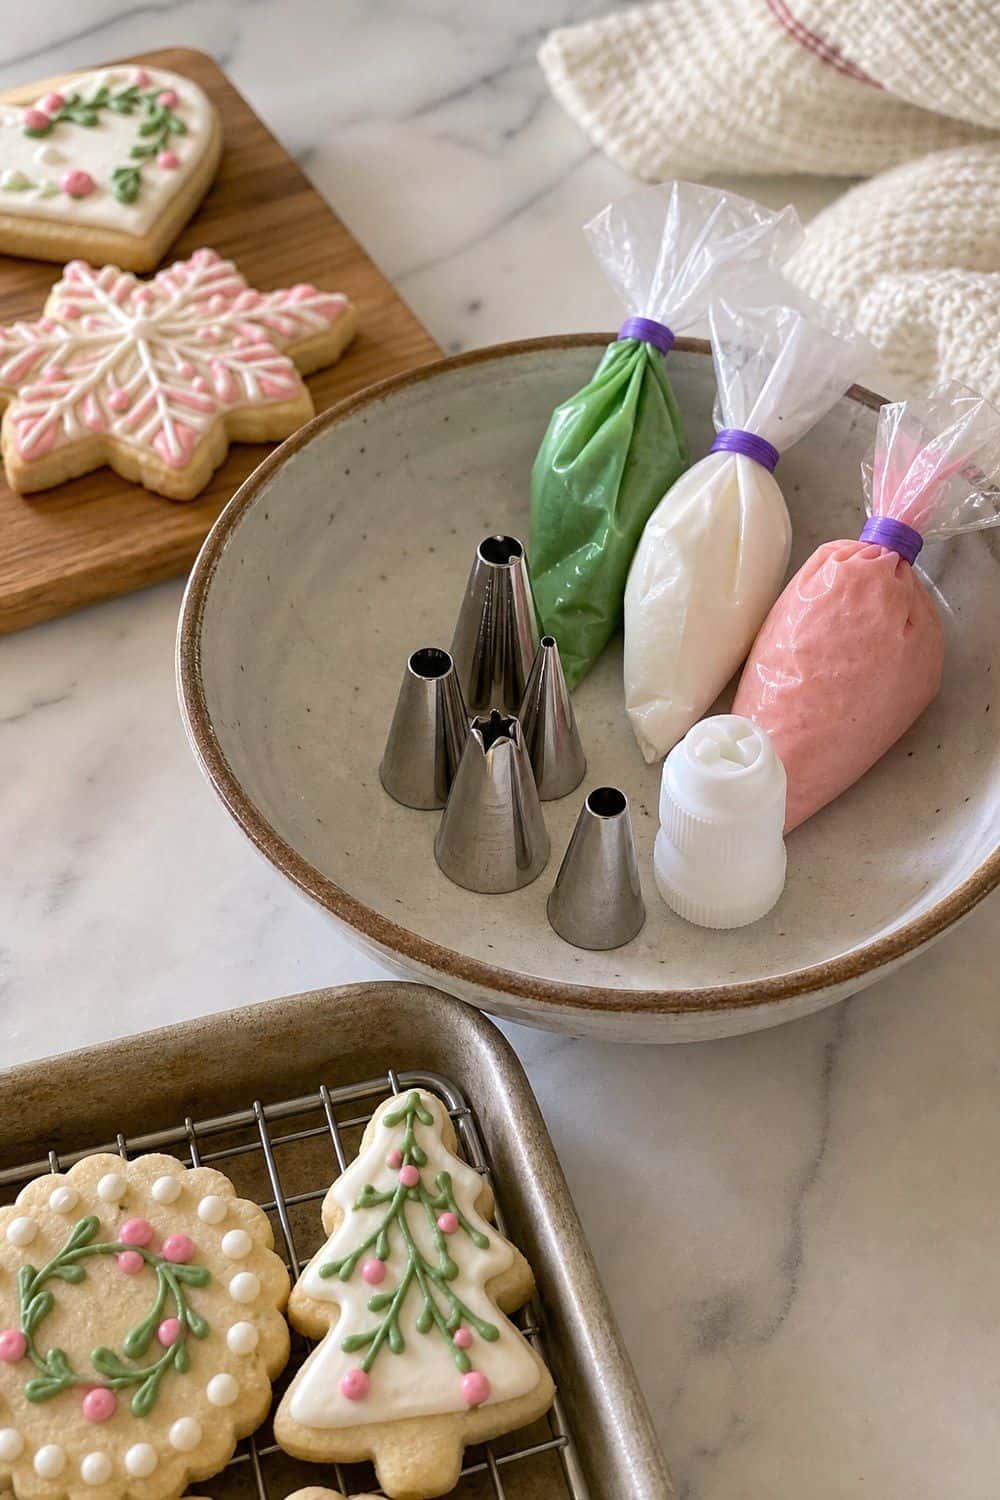
Small tip choices keep the decorating table useful without becoming a pastry-school lesson. Small round tips handle outlines and dots, a star tip can make borders, and a leaf tip can make quick greenery.
A small piping tips set is enough for a Christmas baking party where guests are decorating for fun. Put the tips in a shallow bowl or tray so people can see what is available. Attach tips before the party if you are using couplers. Tiny metal pieces are easy to misplace once the table has sprinkles, parchment, and cookie boxes on it. Keep this area for adults, teens, or confident decorators. Younger kids usually have more fun with spread-and-sprinkle tools than with precise pressure control.
9. Sprinkles in Ramekins
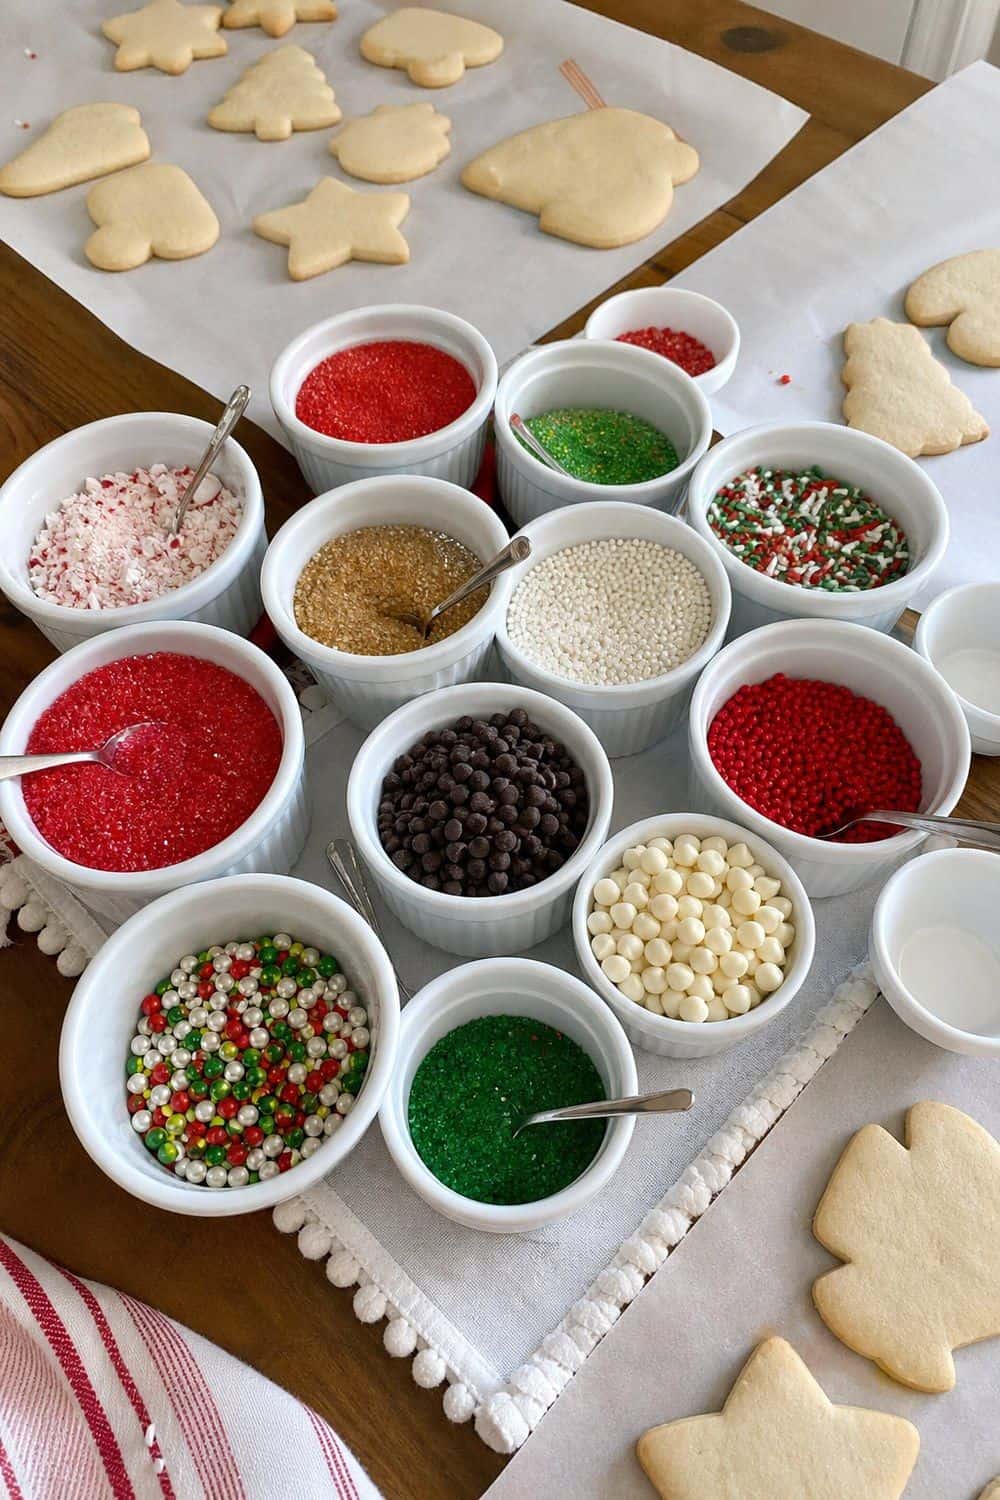
Sprinkle containers are built for shelves, not party tables. If guests shake directly from the original jar, one cookie often gets half the bottle while the table gets the rest. A ramekin set turns sprinkles, sanding sugar, crushed peppermint, mini chips, pearls, and edible glitter into shareable toppings. Small bowls also make it easier to pass colors around the table. Use spoons or tiny pinch cups for very fine toppings. Little hands can get excited, and a tool slows down accidental dumps. Refill ramekins in small amounts. The party feels abundant without placing every sprinkle you own within reach of one enthusiastic decorator.
10. Parchment for Table Protection
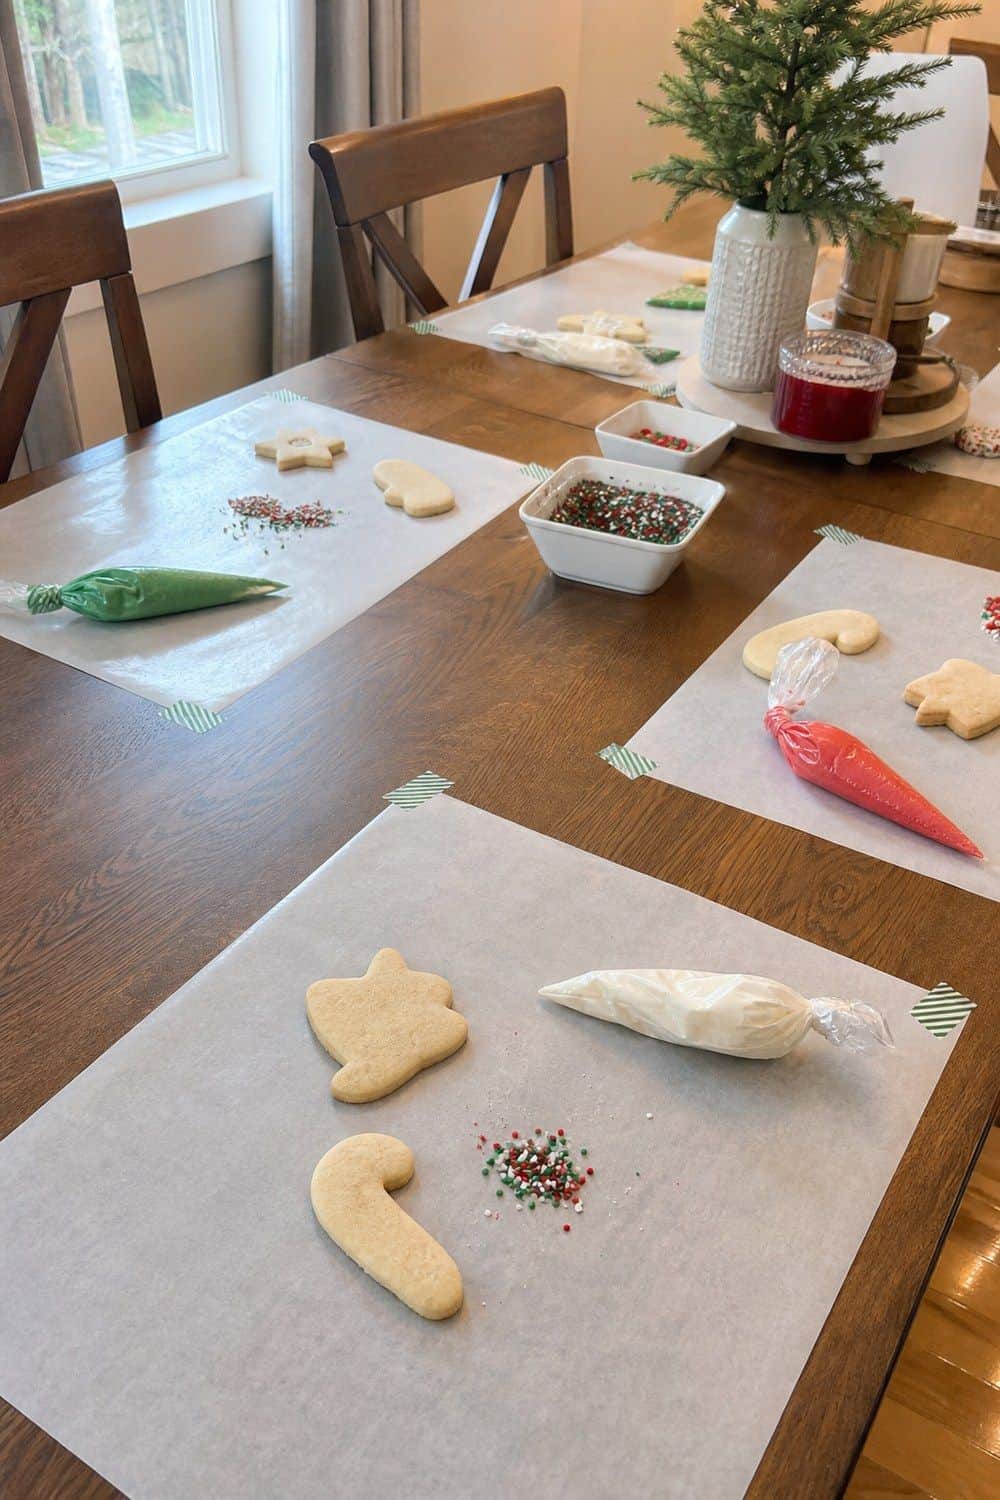
Cookie decorating is supposed to be a little messy, but the mess should have borders. Parchment catches icing drips, crumbs, sprinkles, and practice lines better than a bare table or beloved tablecloth. Parchment paper sheets can become individual decorating mats for each guest. Write names lightly on the corner if several people will leave cookies to dry in place. Use fresh sheets when a station gets too sticky. Trying to decorate over hardened icing smears and sprinkle dust makes later cookies look rough before anyone starts. Tape corners down if kids are decorating. Sliding parchment turns a careful icing line into a sleeve full of sugar.
11. Sheet Pans as Decorating Trays
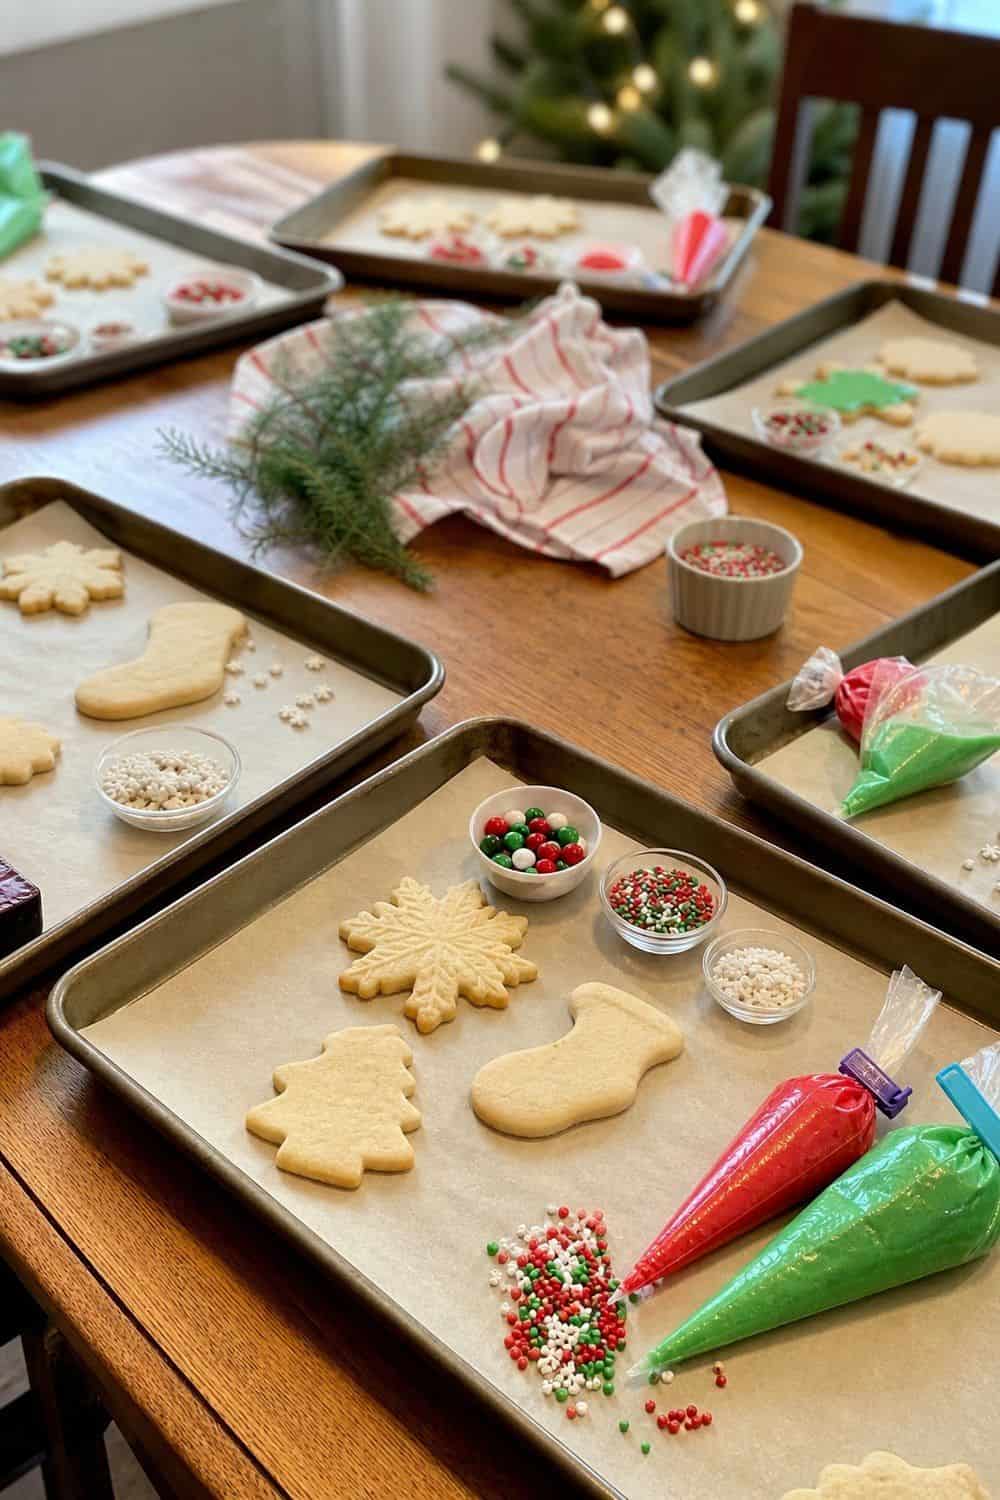
Rimmed trays make a cookie decorating setup much easier to move. They contain sprinkles, hold wet cookies, and let the host shift a project away from the table if someone needs more space. A rimmed baking sheet can serve one guest, two kids sharing supplies, or a family group.
The raised edge catches loose sprinkles and round candies before they scatter across the table. Line each pan with parchment so finished cookies do not stick. When the tray gets messy, lift the paper and replace it instead of wiping icing around the pan. Trays also help with traffic flow. A guest can decorate at the main table, then carry the entire pan to the drying zone without touching wet icing.
12. A Drying Rack Zone
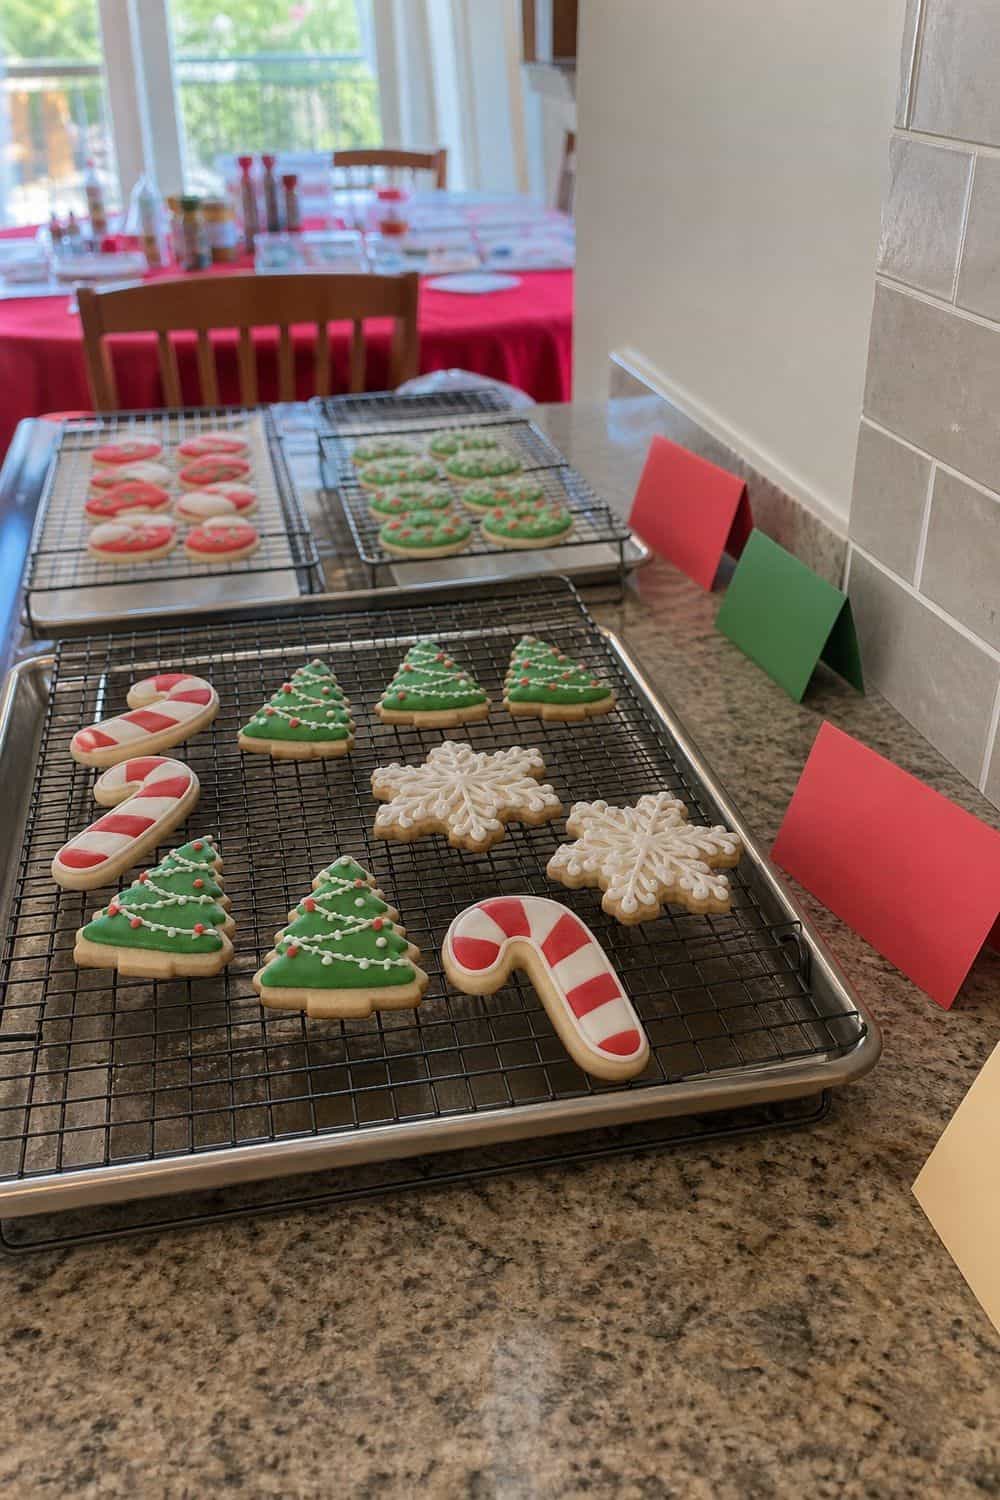
Wet designs need somewhere to rest where they will not be bumped by elbows, sleeves, or the next round of blank cookies. Drying space is one of the most important parts of the cookie decorating setup.
A cooling rack set placed over sheet pans gives wet icing airflow and catches any drips. Arrange racks away from the active decorating table so guests are not reaching over finished work. Label spaces by guest if the group is large. It prevents the classic party question of which snowman belongs to whom. Even royal icing needs time, and cookies boxed too soon can lose lines, dents, and tiny details before guests reach the car.
13. Toothpicks for Tiny Fixes
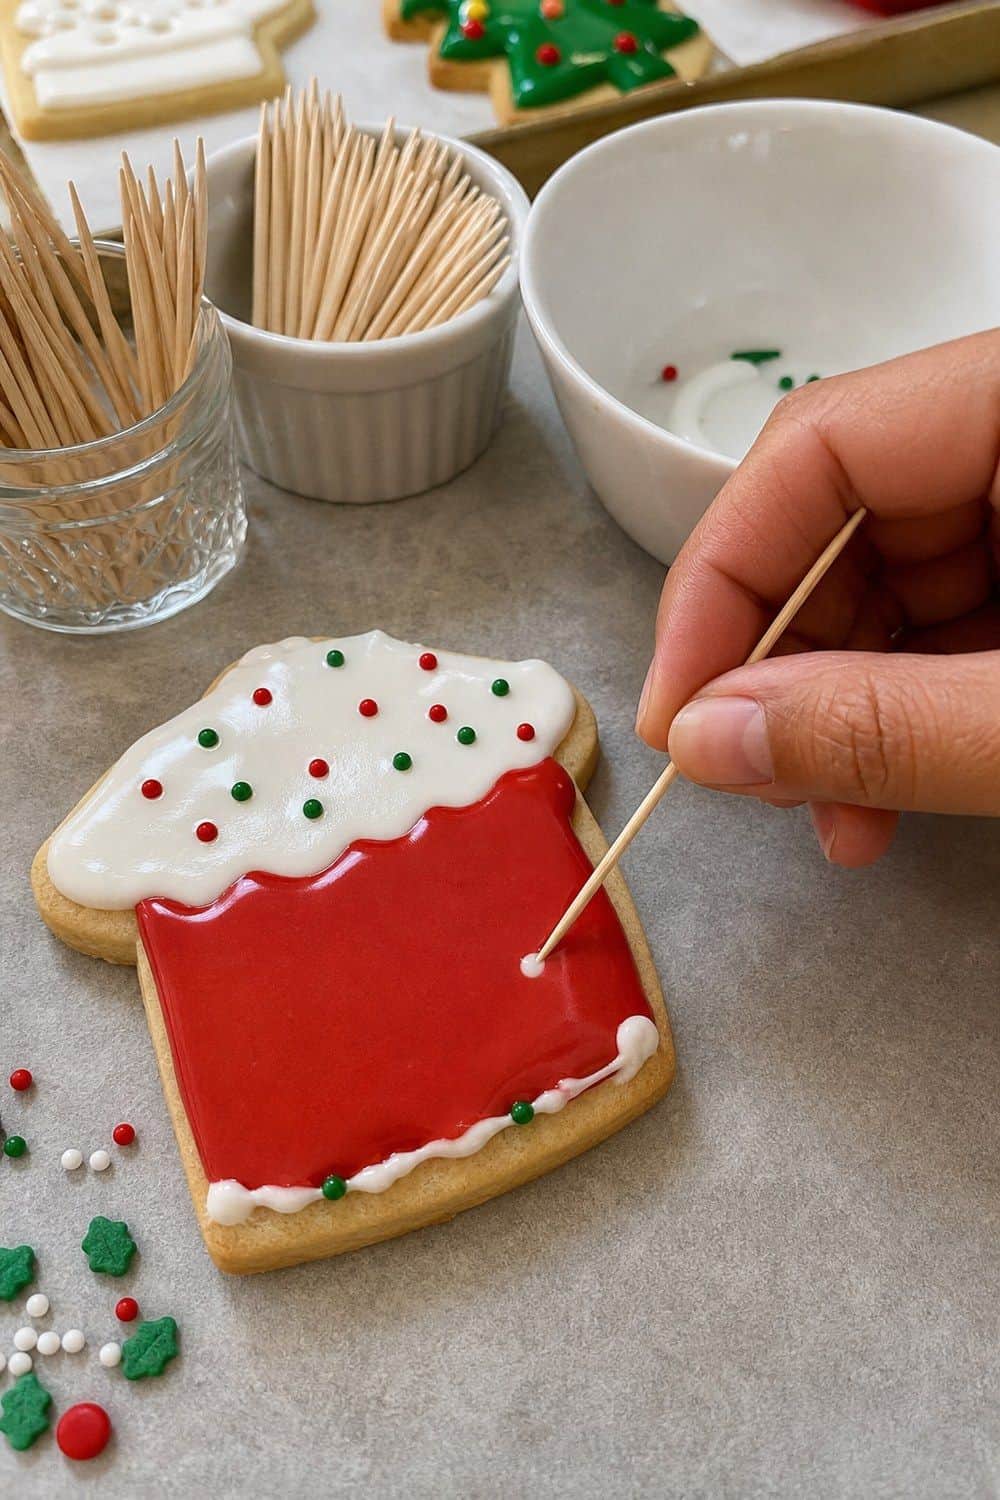
Tiny mistakes are easier to fix before they dry. Toothpicks can drag icing into corners, pop air bubbles, pull marbled lines, nudge sprinkles, and clean up a small edge. Bamboo toothpicks are inexpensive enough to set out in several cups. Put a small discard bowl nearby so used toothpicks do not end up back on the table. This is a low-pressure tool for beginners because it solves problems after icing is already on the cookie. Guests can adjust a tree point or ornament line without starting over. For younger children, supervise toothpicks or offer rounded craft sticks instead.
14. Spread-and-Sprinkle Station for Younger Kids
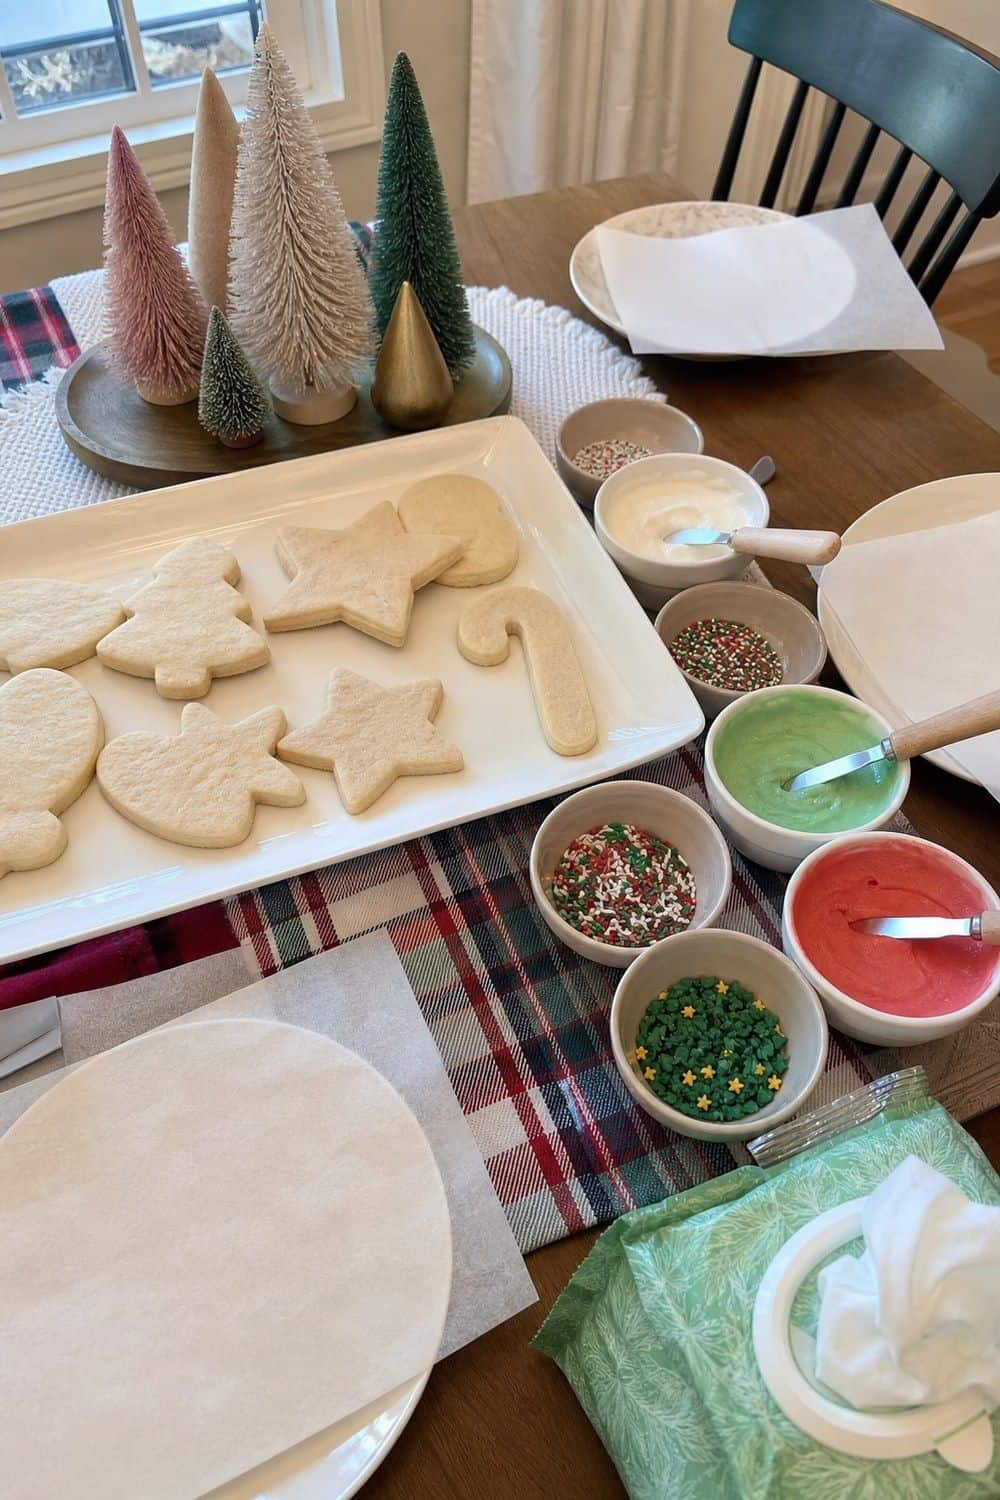
Younger kids often want speed, color, and permission to be messy. Give them thicker icing, sturdy cookies, and a station where spreading and sprinkling is the whole activity. Mini offset spatulas are easier for small hands than piping bags.
They spread icing more smoothly than a spoon and feel special without requiring precision. Keep the icing colors limited and the sprinkles in small ramekins. A little structure helps kids succeed without turning the table into one giant sugar pile. Place this station at one end of the table with extra parchment and wipes. Adults can help without blocking older kids or adults working on detailed cookies.
15. Marbled Icing for Older Kids
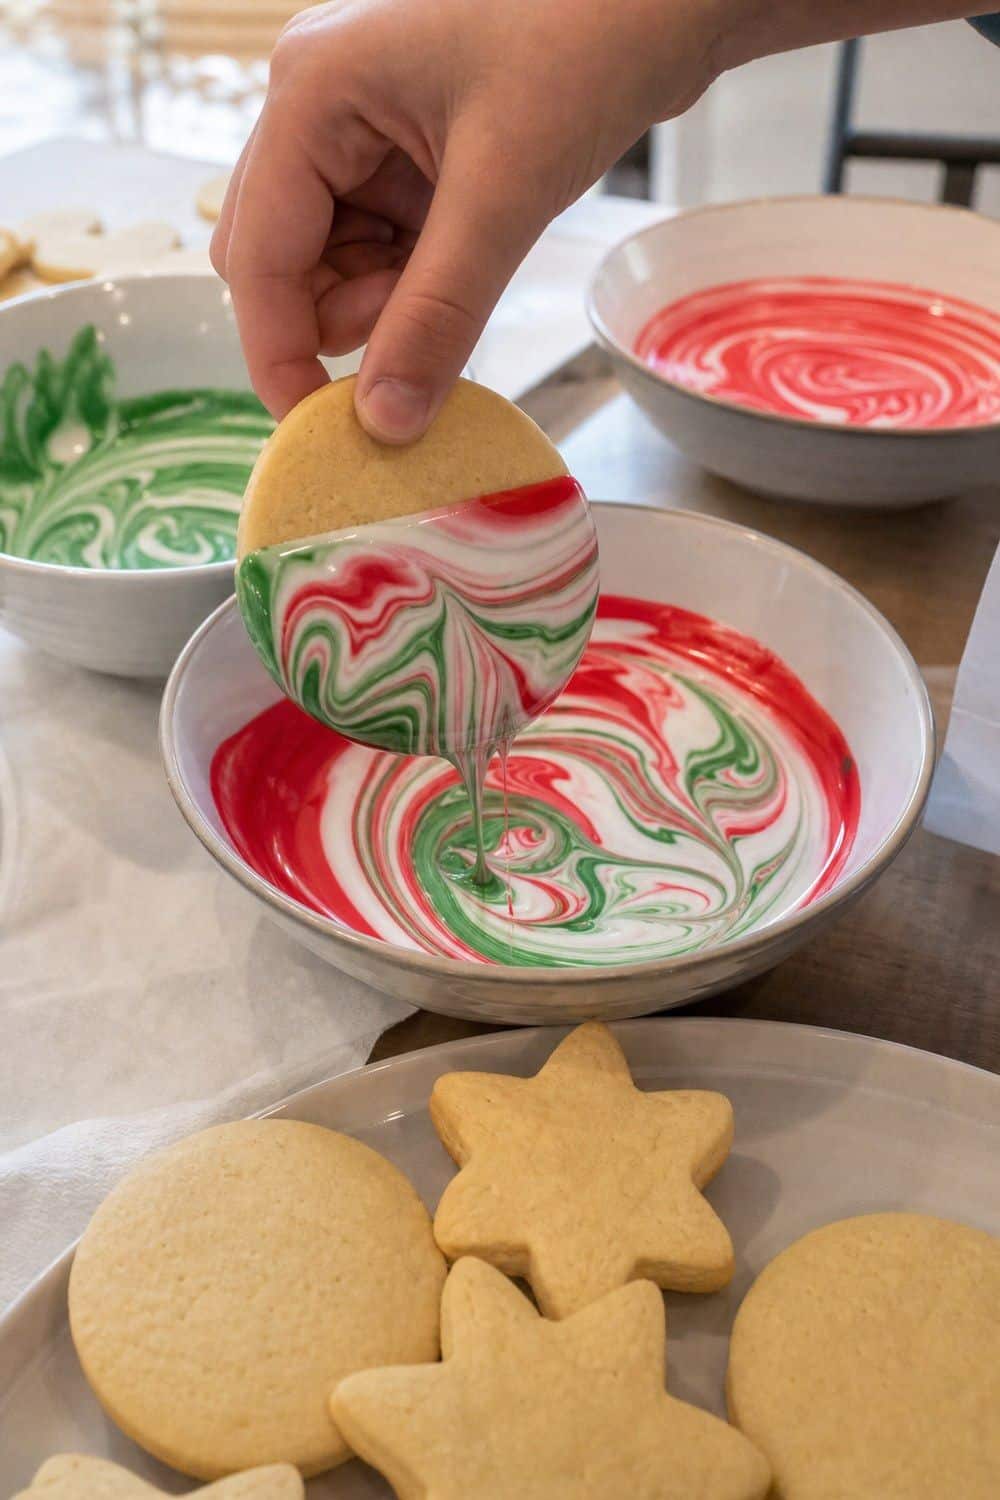
Marbled icing gives older kids a dramatic result without requiring perfect piping. Swirl two or three colors together, dip the cookie face-down, lift it, and let the excess drip back into the bowl. Shallow dipping bowls make the technique easier because the cookie can touch the icing surface without disappearing into a deep bowl.
Keep the icing layer wide enough for your largest shape. If kids stir too much, the colors blend into a muddy shade instead of a marble pattern. Use this station for sturdy shapes like circles, stars, trees, or ornaments. Fragile gingerbread arms and thin points can break when dipped and lifted.
16. An Adult Detail Table
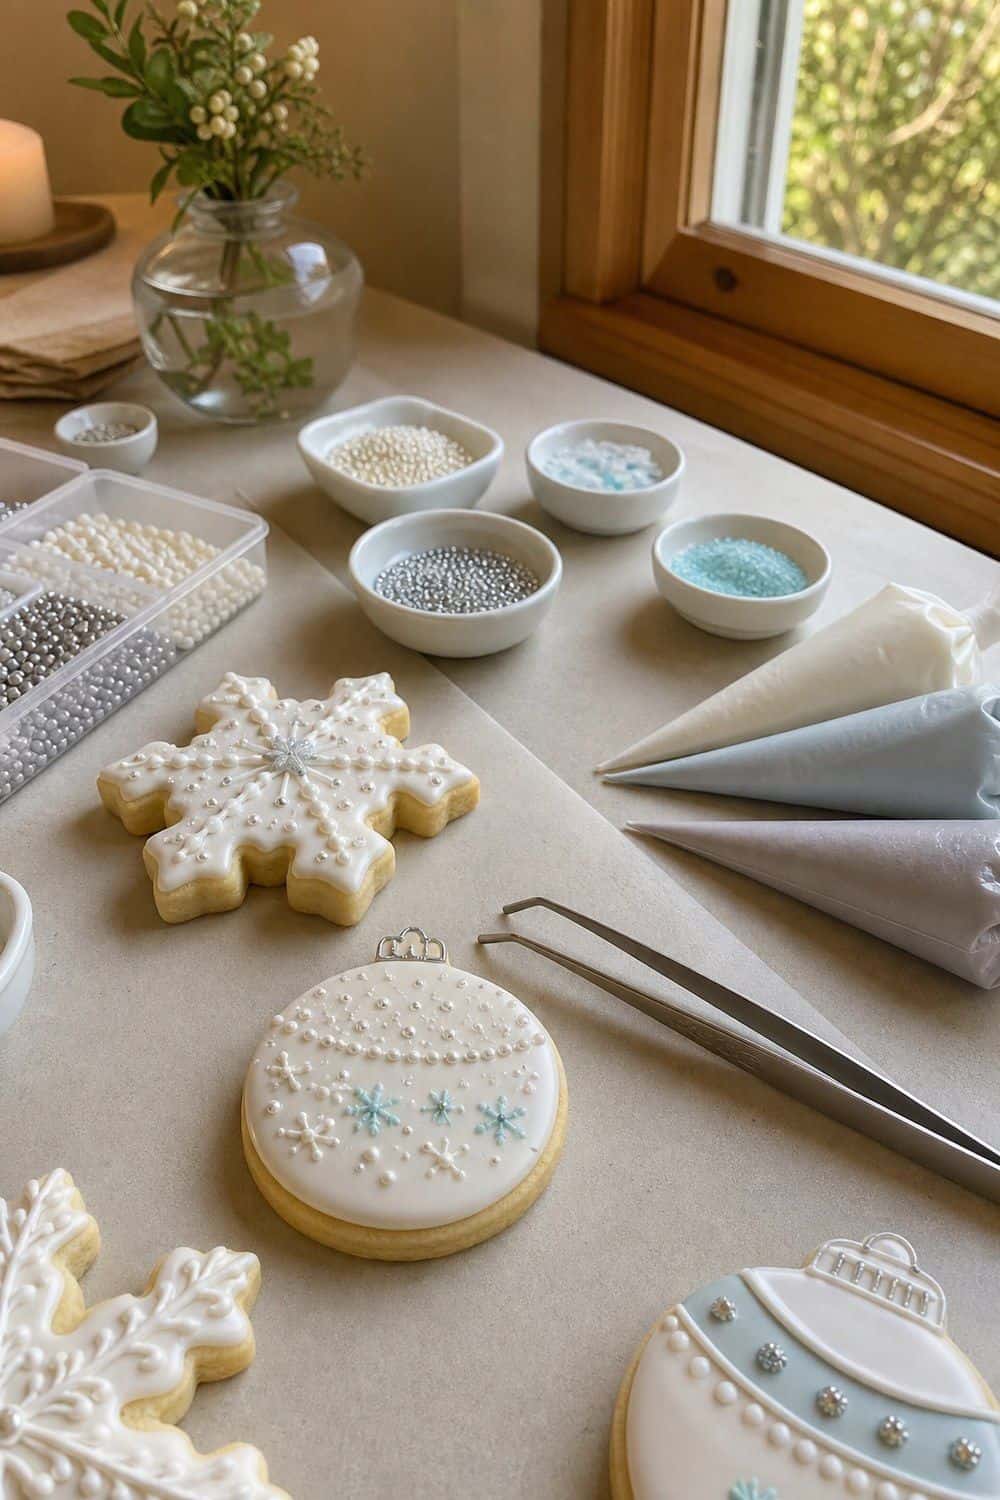
Adults and teens may want a quieter table for small designs. This is where tiny dots, edible pearls, sanding sugar lines, painted accents, and more controlled piping can happen away from the younger-kid sprinkle zone.
Cookie decorating tweezers help place small decorations that fingers tend to smear or drop. They are especially useful for pearls, tiny candies, and delicate snowflake or ornament details. Keep this table smaller and calmer than the main station. Too many tools can make guests feel like they are being tested instead of invited to play. Offer one or two examples, then let people improvise. A detail table should feel like a creative corner, not a mandatory advanced class.
17. Practice Parchment for First Lines
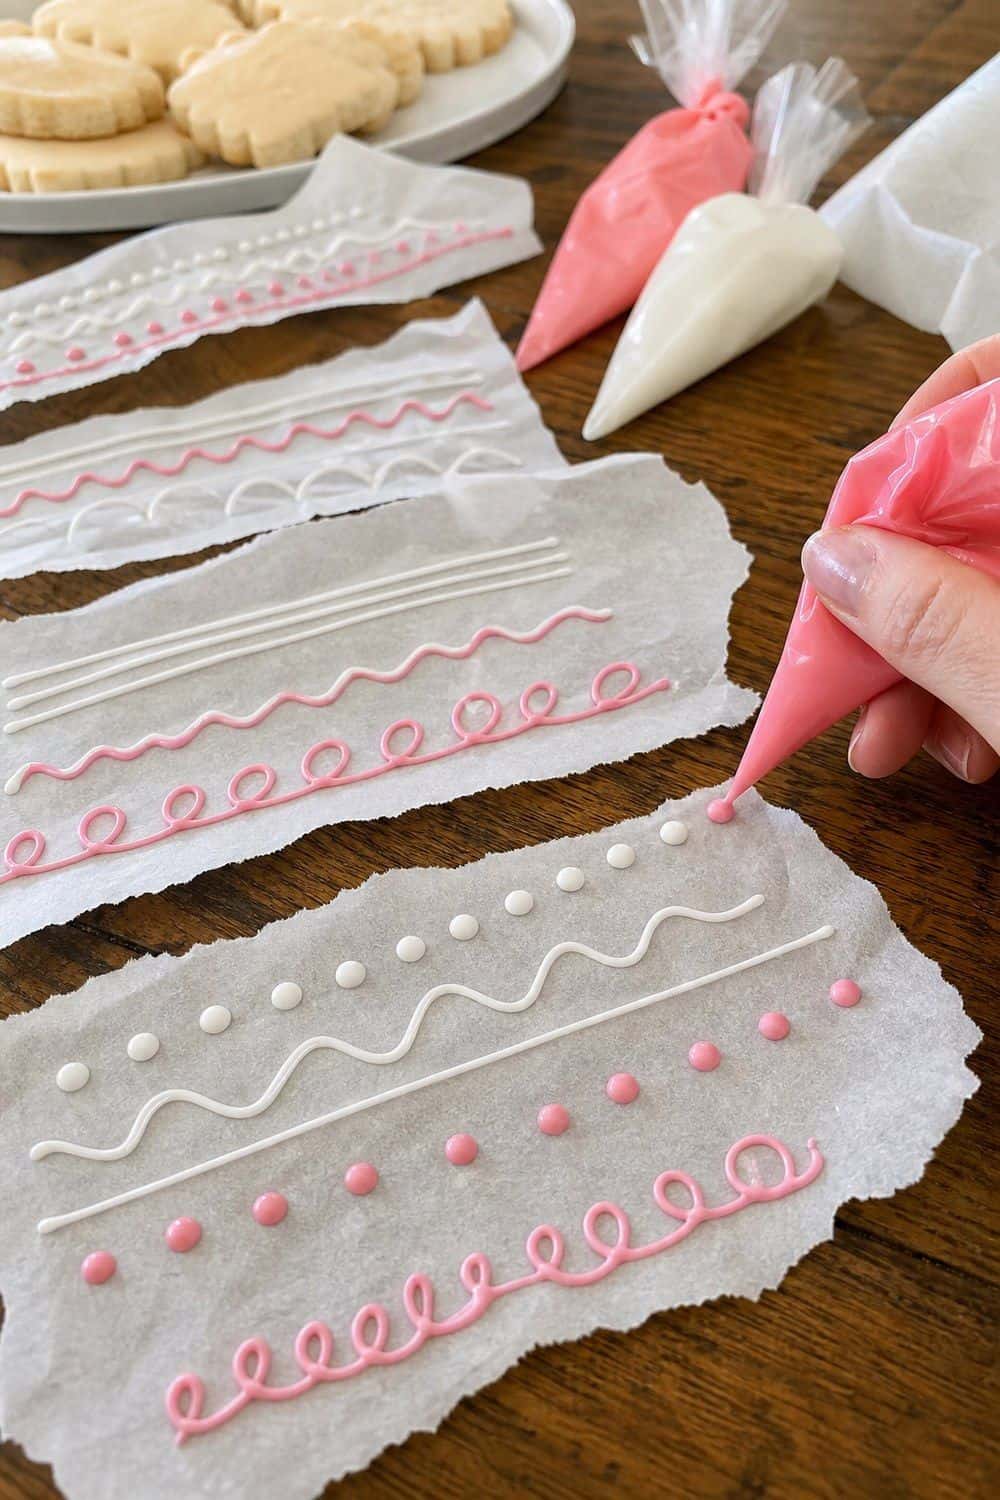
Piping feels less intimidating when guests can practice before touching a cookie. A few lines, dots, loops, and names on parchment teach pressure control quickly. A parchment roll lets you tear off practice strips as needed. Place them near the piping bags so guests naturally test the icing before decorating their favorite cookie. This small step prevents a lot of nervous first-cookie disasters. Beginners learn whether the icing is fast, stiff, loose, or too thick before the design matters. Practice parchment also gives kids a place to draw with leftover icing. That can be its own activity while finished cookies dry.
18. Damp Towels Over Icing Bowls
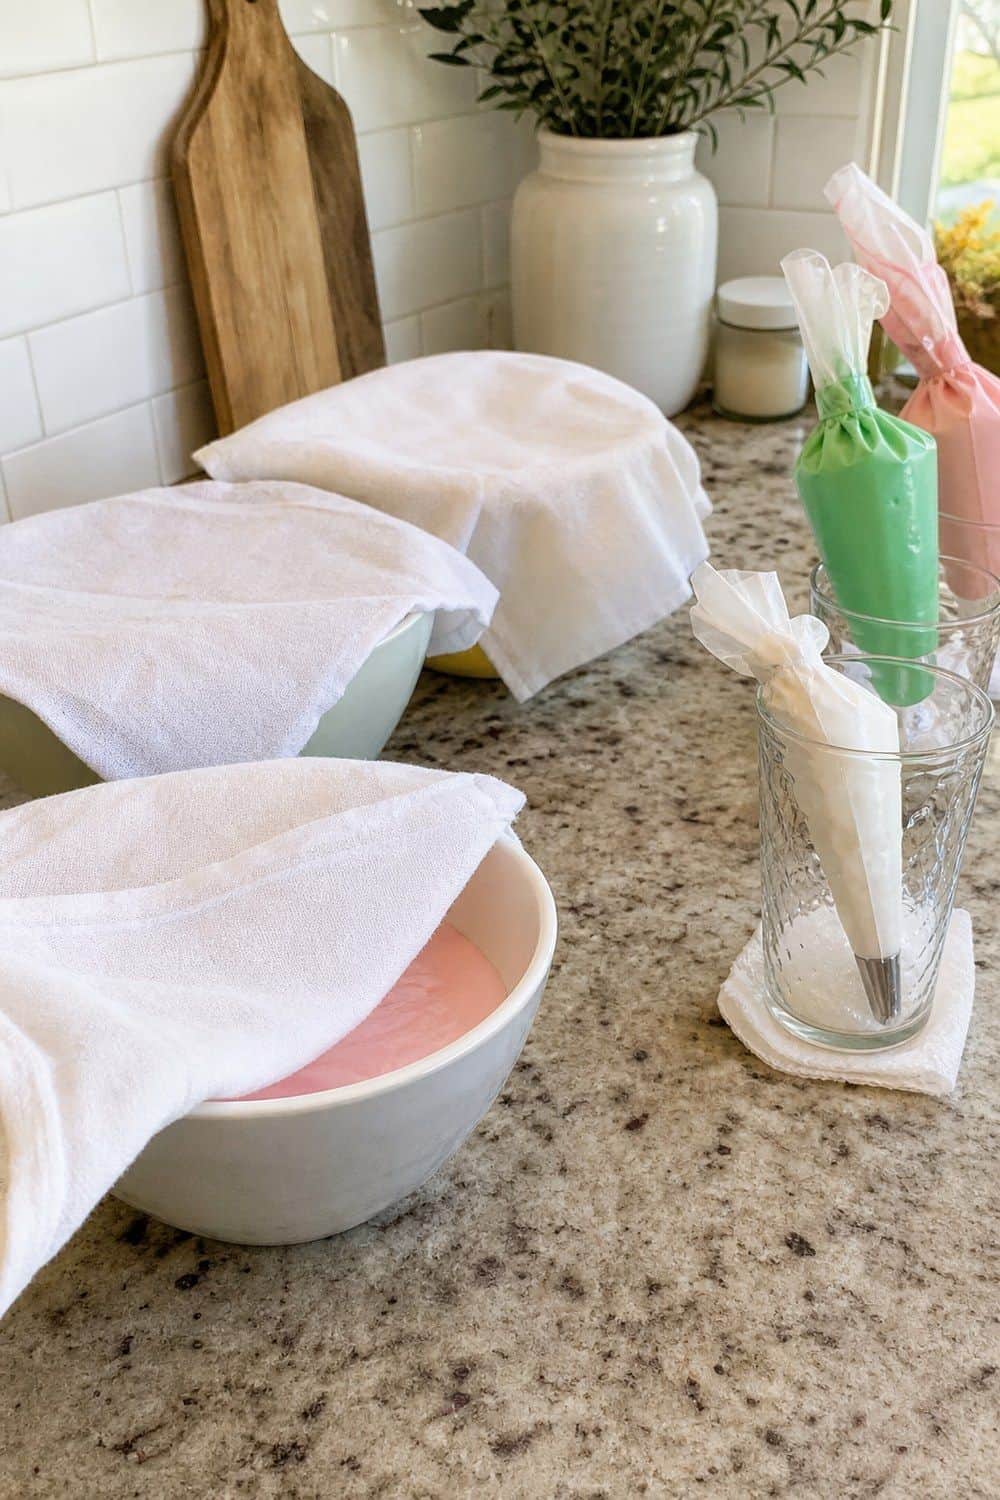
Royal icing can crust when it sits exposed to air. Once that dry skin forms, it can clog tips, leave flakes in smooth icing, and make flooding look lumpy. Flour sack towels work well as lightweight damp covers for bowls between decorating rounds.
Wring them well so water does not drip into the icing and thin it unexpectedly. Use separate towels for different stations if possible. A towel dragged through red icing and then placed over white can create exactly the color problem you were trying to avoid. For piping bags, keep tips covered or set them tip-down in cups with a damp paper towel at the bottom. The point is to keep icing workable without flooding the table with moisture.
19. Savory Snack Before the Sugar Starts
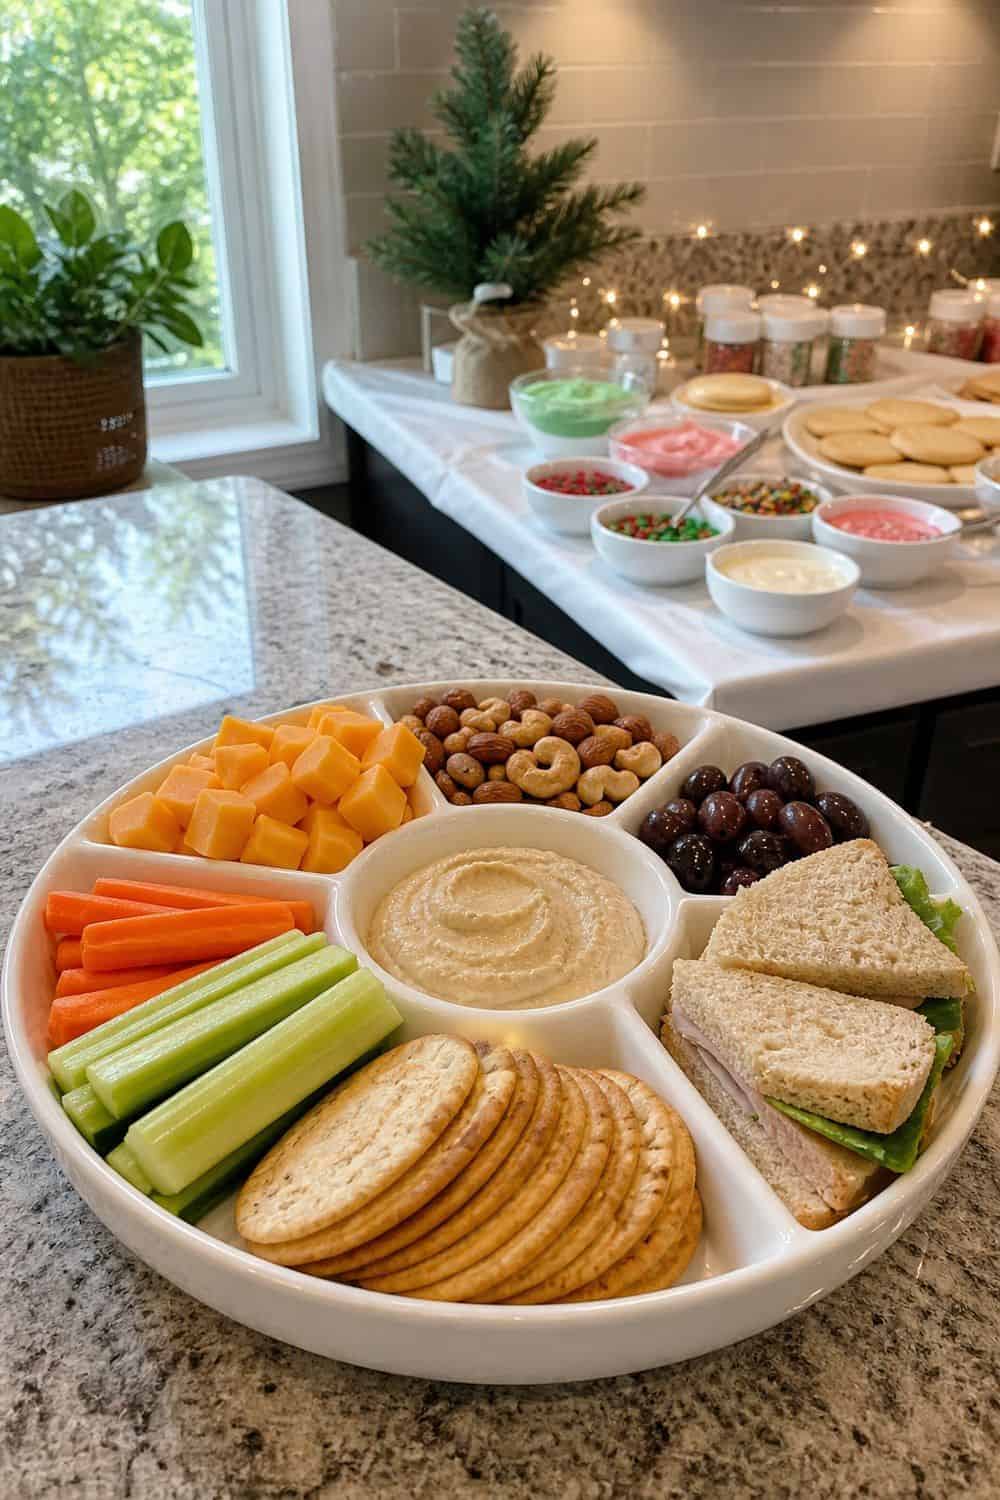
Sugar tastes more fun when guests have eaten something savory first. Cheese, crackers, vegetables, hummus, nuts, olives, or little sandwiches can steady the room before icing and hot chocolate take over. A divided snack tray keeps savory food away from sprinkles and wet icing. Set it on a separate surface if possible so cracker crumbs do not land on fresh cookie designs. Keep snacks easy to grab and not too greasy. This is not the moment for saucy food that transfers onto piping bags. If young kids are decorating, serve the snack before the main cookie table opens.
20. Hot Chocolate or Coffee Station
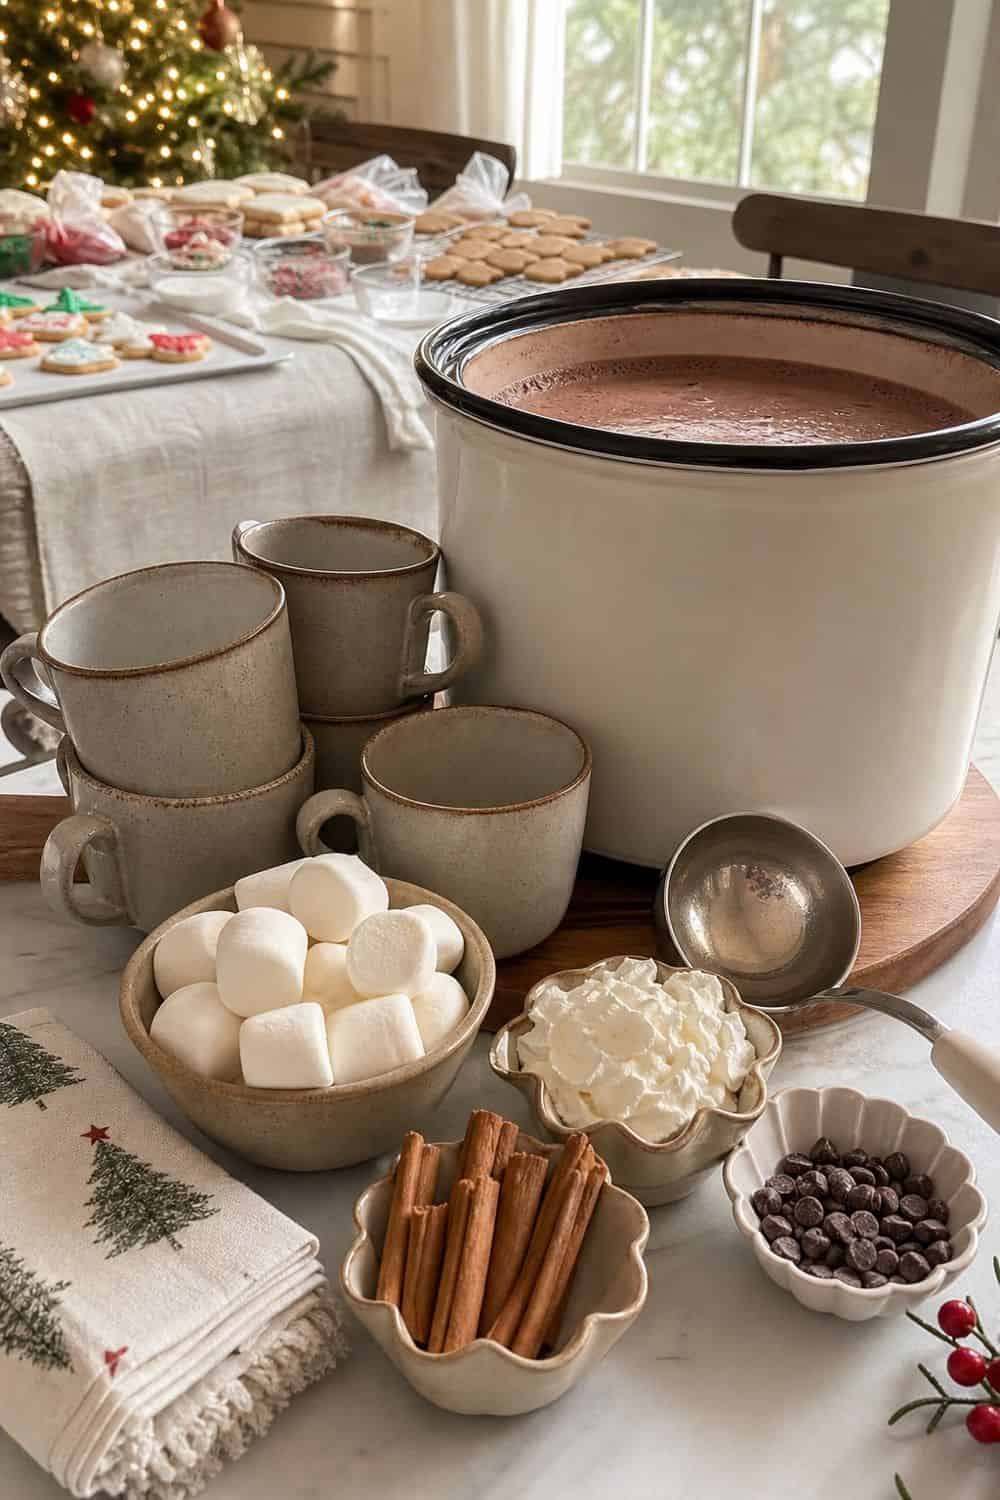
Hot drinks give guests something to hold while cookies dry. Hot chocolate, coffee, tea, milk, or gingerbread lattes all fit the Christmas baking party mood without pulling attention from the decorating table. A slow cooker can keep hot chocolate warm and self-serve. Put mugs, ladles, marshmallows, whipped cream, cinnamon, and napkins nearby so the host is not making every cup. Keep drinks away from wet cookies. A spilled mug can ruin several trays faster than any piping mistake. For mixed ages, make the hot drink station adult-managed or placed where little kids need help. Warm drinks and crowded decorating tables need a bit of distance.
21. Cookie Boxes Before Guests Leave
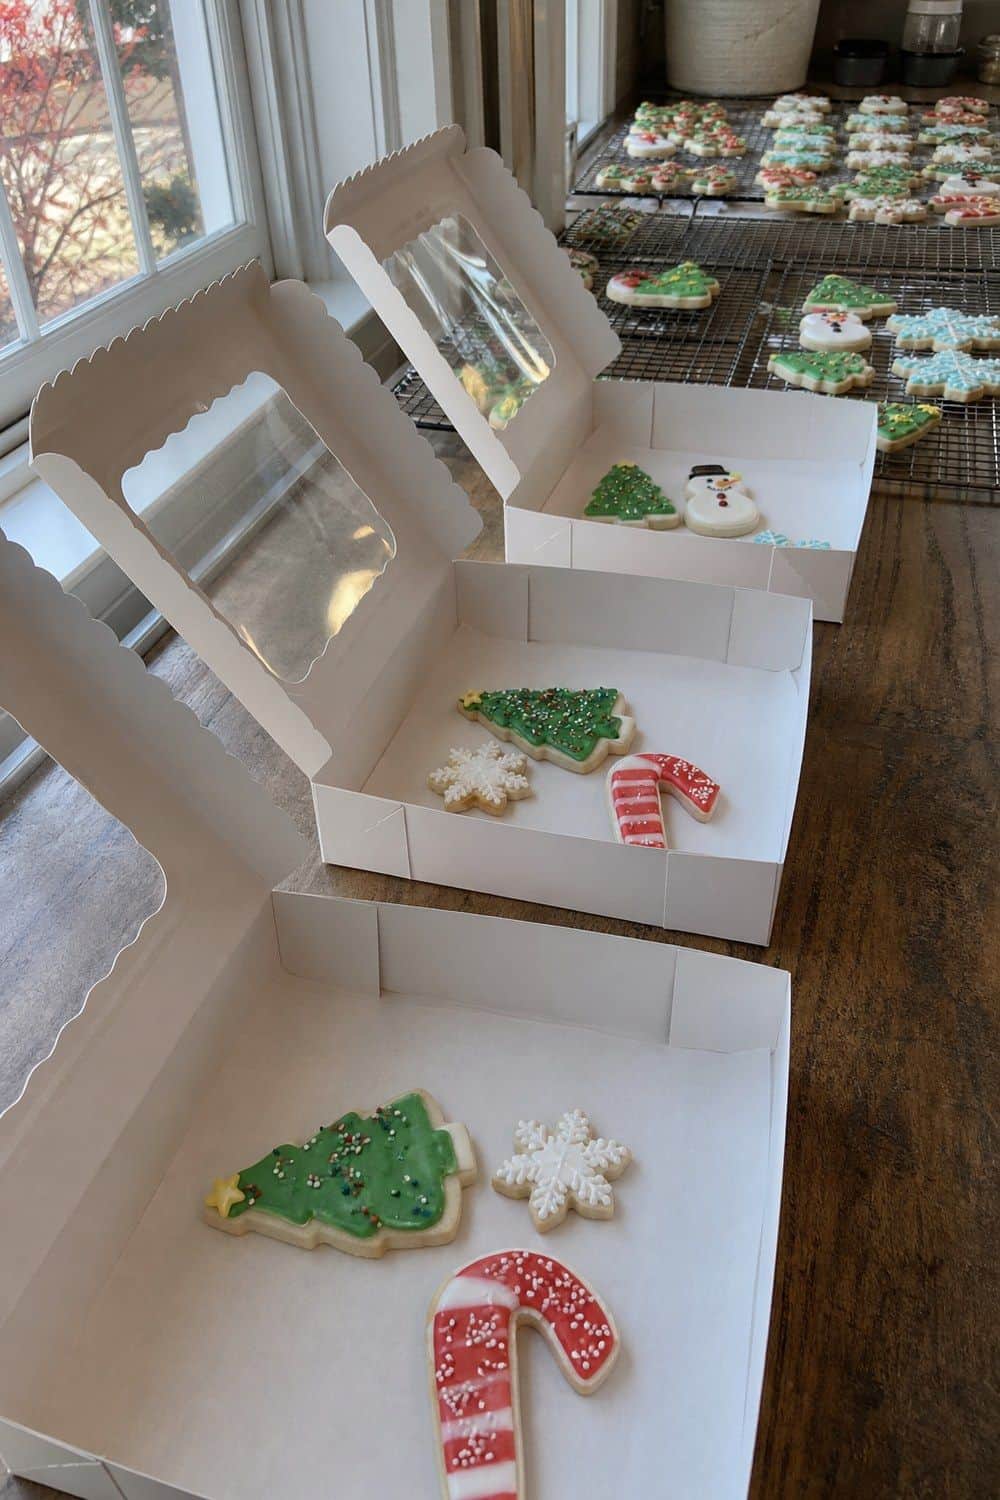
Take-home packaging should be ready before the first guest asks to leave. Decorated cookies need a flat, protected ride home, especially if the icing is still firming up.
Window bakery boxes let guests see their finished cookies without reopening the lid every few minutes. Choose shallow boxes when possible so cookies do not slide into tall stacks. Write names on boxes early, while everyone still remembers which snowflake belongs to which guest.
If cookies are still wet, leave boxes open until the last possible moment. A lid pressed onto soft icing can undo a lot of careful decorating.
22. Parchment Between Cookie Layers
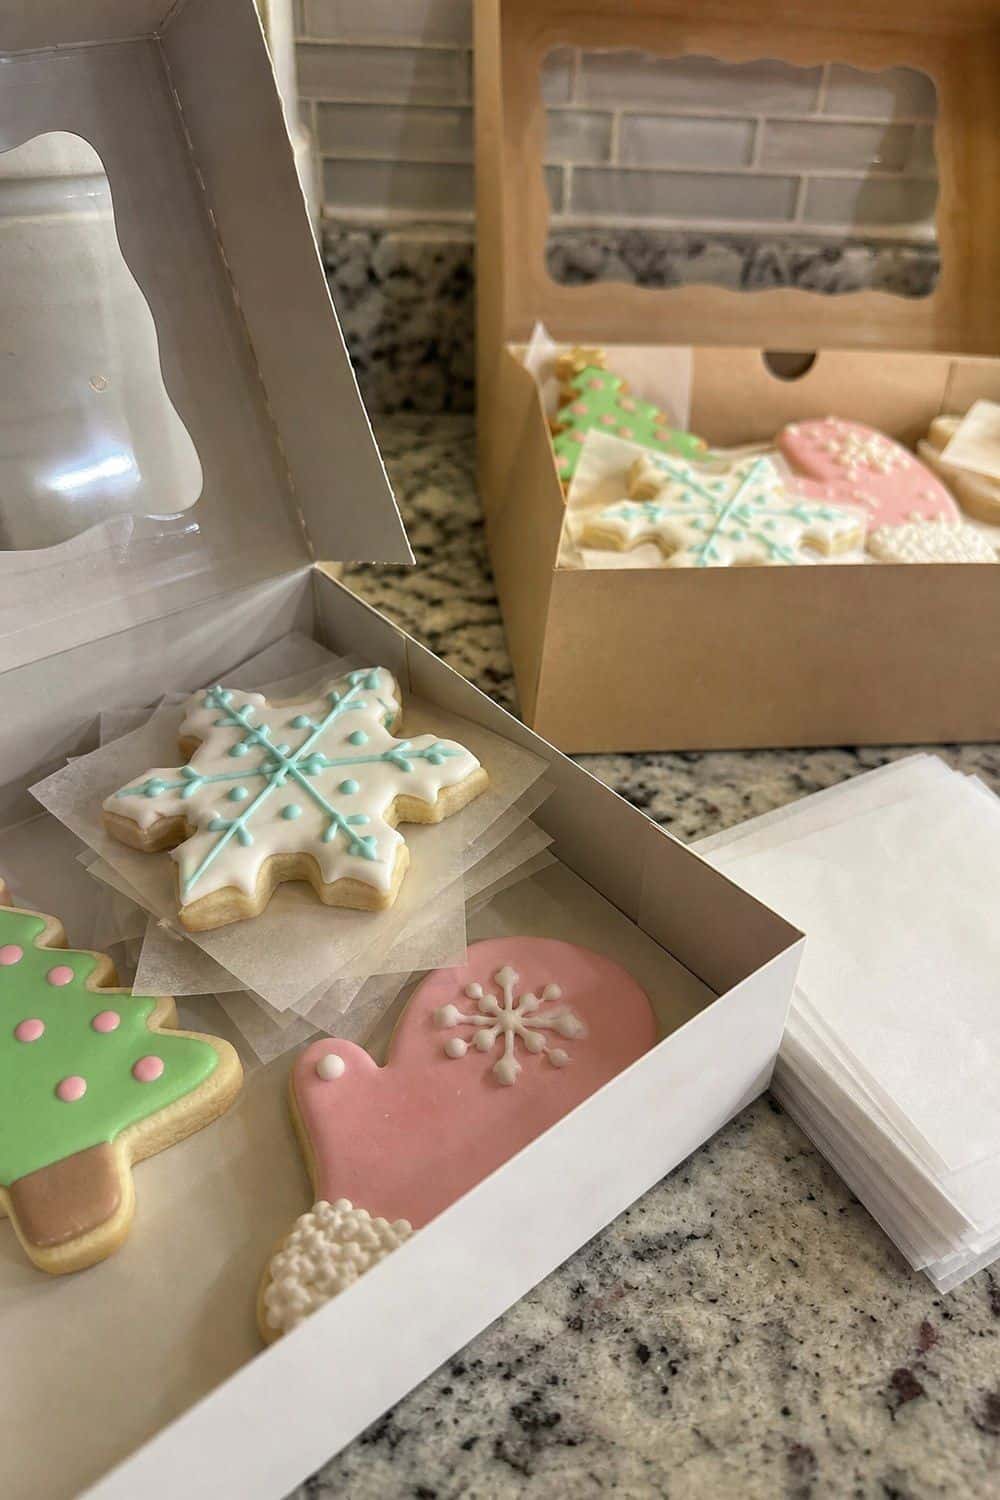
Layering decorated cookies only works when the icing is dry enough and the cookies are separated. Otherwise, designs stick, colors transfer, and the prettiest cookie ends up glued to the one above it. Pre cut parchment squares make packaging faster because guests do not have to tear paper while holding a box. Set a stack beside the bakery boxes and show how to place one sheet between layers. Use parchment for dry or mostly dry cookies, not as a cure for wet icing. If the surface is still soft, give the cookie more drying time instead of stacking it. This is also helpful for different flavors.
23. Photo Spot Before Boxes Close
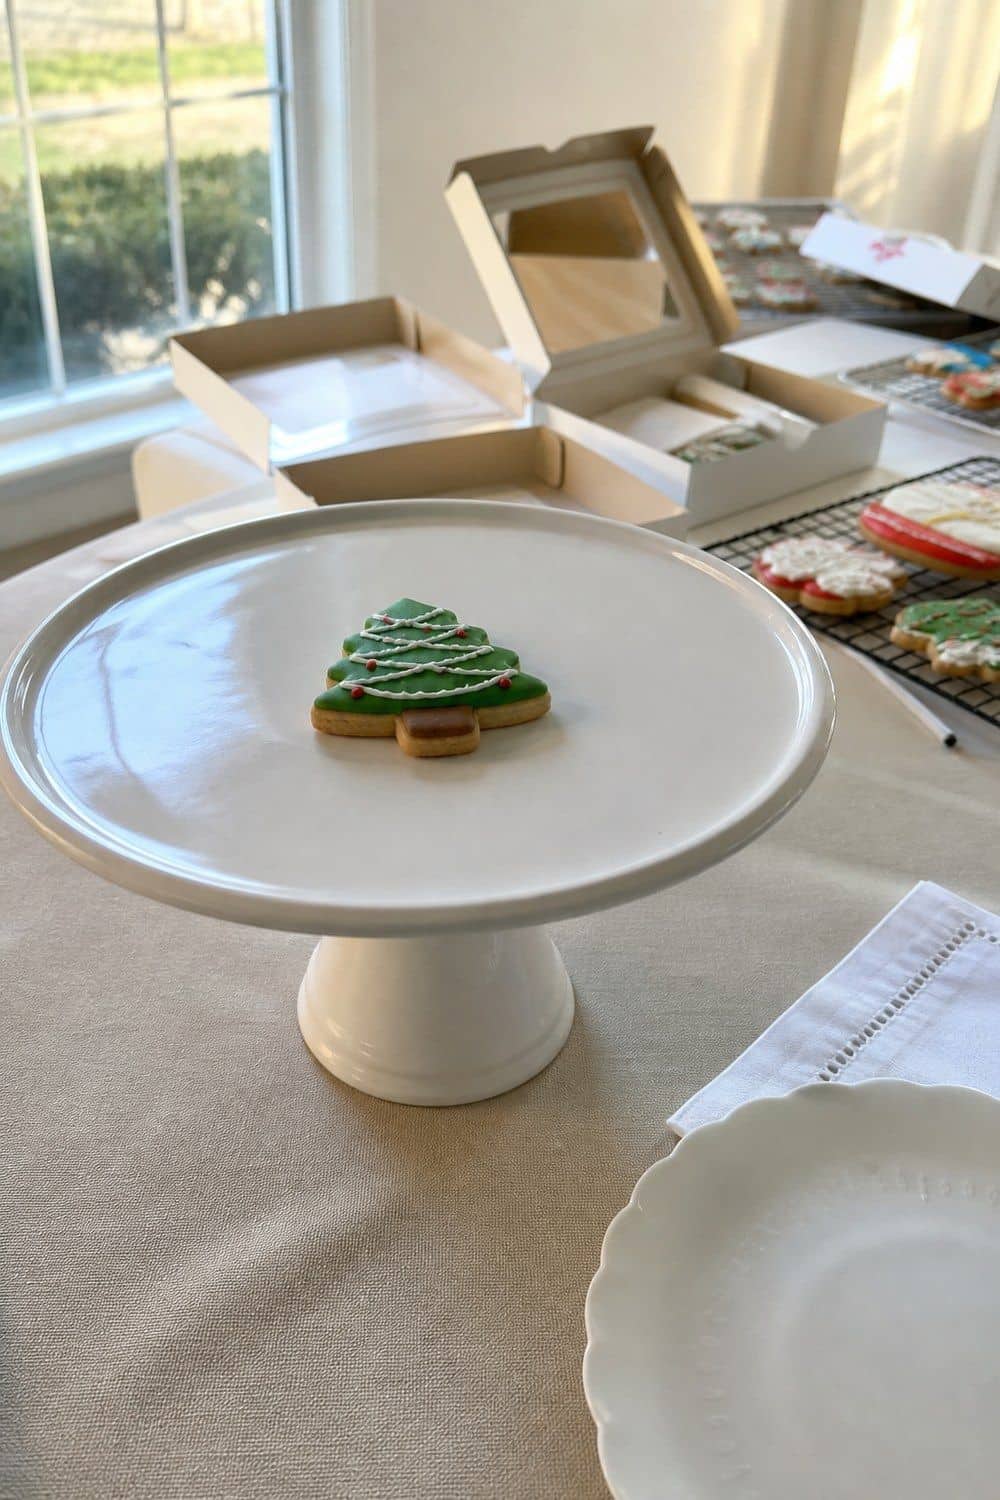
Freshly decorated cookies deserve a quick photo before they disappear into boxes. A small photo spot gives guests a clean place to capture their favorite designs without blocking the drying racks. A white cake stand works because it lifts the cookie slightly and keeps the background calm.
Add a plate, napkin, or tray if the cookie is still too delicate to move by hand. Keep the photo spot simple. A whole staged scene slows down the party and can make guests feel like their cookies need to be perfect. Place it near natural light if the party is daytime, or near a lamp if it is evening. The goal is a quick memory, not a second decorating station.
24. Cleanup Wipes and Trash Kept Visible
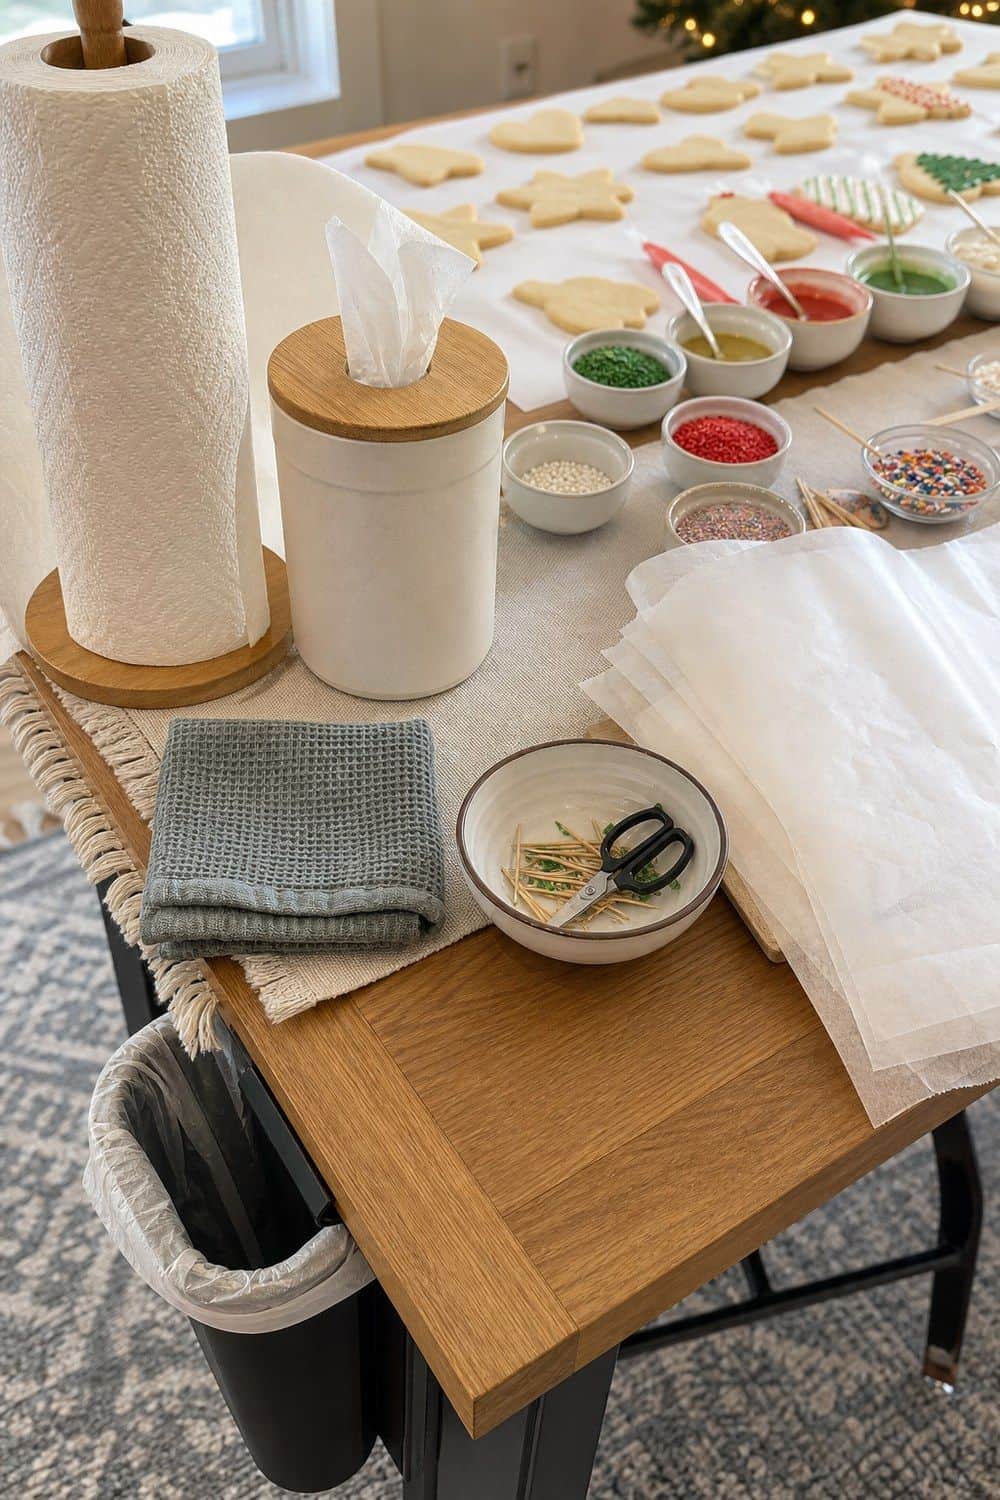
Cleanup should be visible from the beginning, not introduced after the table is already buried. Cookie decorating creates parchment scraps, empty sprinkle cups, icing snips, toothpicks, and paper towels quickly. A tabletop trash bin gives guests permission to clean as they go.
Put it near the decorating area, along with wipes, paper towels, extra parchment, and a place for used tools. Keep one damp towel for the table and separate towels for hands. Icing spreads fast when the same cloth handles everything. Visible cleanup supplies make the party easier for the host and less intimidating for guests. People are more likely to help when the system is obvious.
25. Mini Decorating Kit for Guests to Take Home
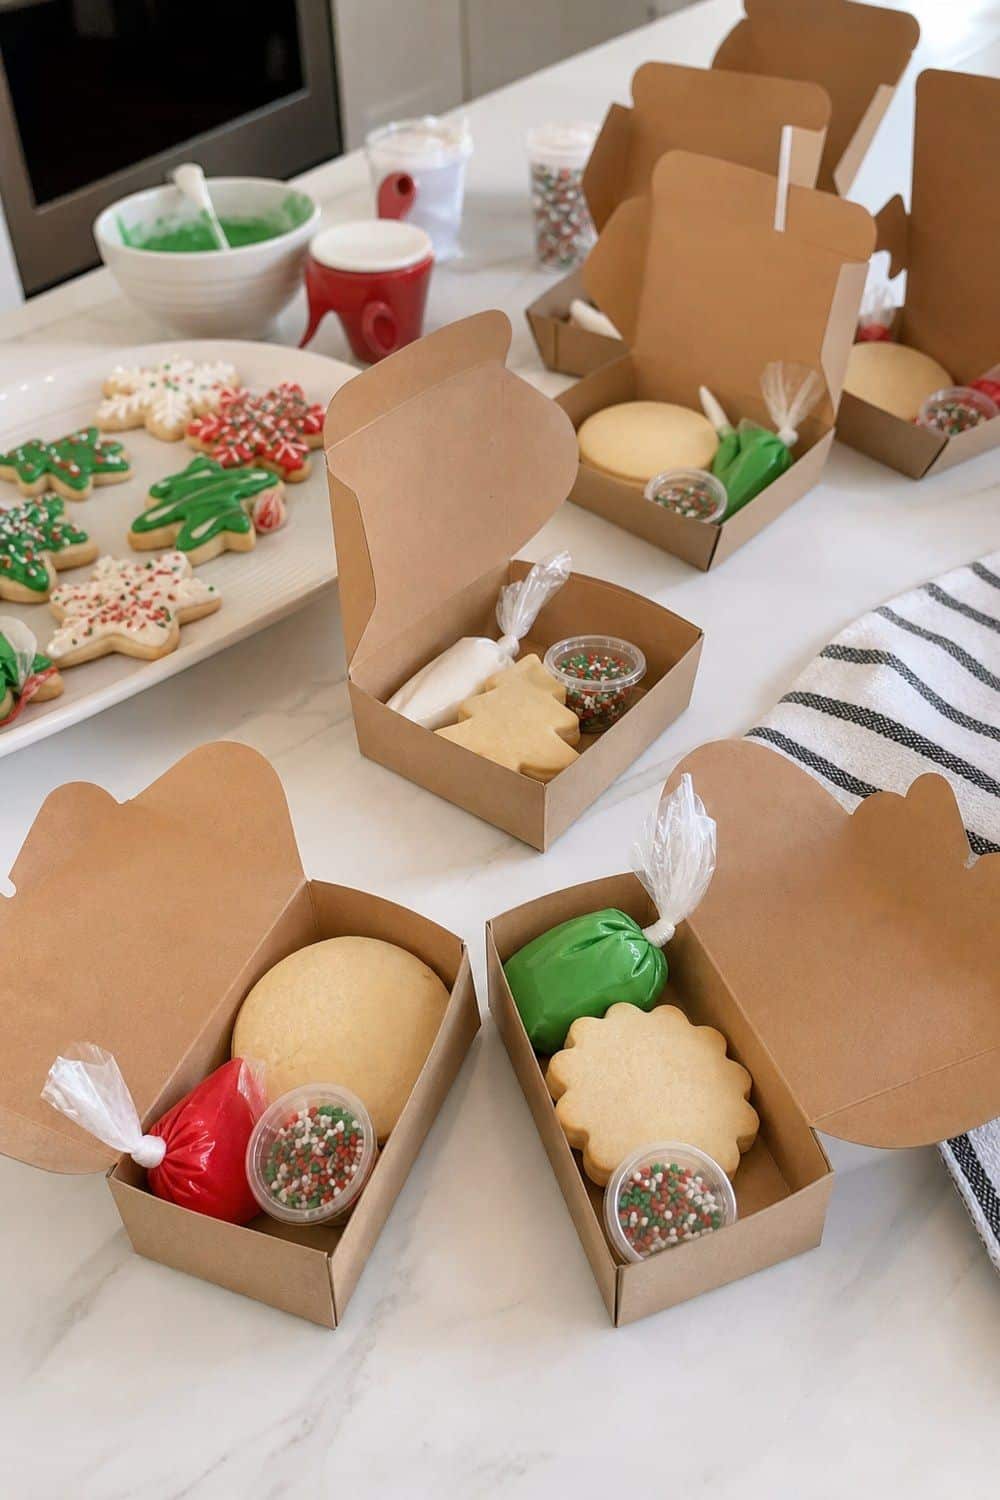
Leftover supplies can become a small take-home kit without creating a huge extra project. Include a few blank cookies, a small icing bag, a sprinkle cup, or a recipe card if guests want to keep decorating later.
A cookie decorating kit can be as small as a box with two cookies and one color. It should feel like a bonus, not a second party the host has to assemble from scratch. Use only supplies that are safe and sensible to send home. Skip anything too messy, too fragile, or hard to explain without the full table setup. This works especially well for guests who had to leave early or kids who wanted more time. The party ends with something playful, and leftover supplies do not sit around the kitchen.
Cookie Decorating Party Setup Tips
A cookie decorating party is different from a cookie exchange because guests make or finish the cookies at the party instead of only bringing finished cookies to trade. The setup needs blank cookies, icing, decorating tools, drying space, and packaging, not just platters of baked goods.
Prep as much as possible before guests arrive: bake and cool cookies, mix icing, fill bags, set out sprinkles, cover the table, stage sheet pans, and clear a drying rack zone. The smoother the setup, the more guests can focus on decorating instead of waiting for supplies.
For mixed-age groups, create different levels of detail. Younger kids can spread icing and add sprinkles, older kids can try marbling, teens and adults can use piping tips and tweezers, and everyone can practice first on parchment.
Avoid warm cookies, too many icing colors, shared sprinkle jars, no drying racks, and no packaging plan. Those are the small mistakes that turn holiday cookie decorating from festive into sticky, crowded, and hard to send home.
Frequently Asked Questions
How do you host a Christmas cookie decorating party?
Bake and cool cookies before guests arrive, then set up icing, sprinkles, tools, parchment mats, sheet pans, drying racks, snacks, drinks, and take-home boxes. Keep the cookie decorating station organized by separating active decorating, drying, drinks, and packaging so guests can move through the party easily.
What supplies do I need for a cookie decorating party?
Useful cookie decorating supplies include blank cookies, royal icing, piping bags, squeeze bottles, sprinkles, ramekins, parchment, rimmed sheet pans, cooling racks, toothpicks, mini spatulas, bakery boxes, wipes, and trash containers. You do not need every professional tool; a small, focused setup is easier for guests.
Should cookies be baked before a decorating party?
Yes. Cookies should be baked and fully cooled before a decorating party. Warm cookies can bend, break, melt icing, and make designs smear. Baking ahead also lets the host focus on helping guests with icing, drying racks, and take-home boxes instead of managing oven timing.
What icing is best for decorating cookies?
Royal icing or another hardening icing is best for cookies that need to dry, stack, or travel. Firmer icing works for outlines and details, while looser icing works for flooding larger areas. Soft frosting is better for cookies that will be eaten right away.
How do I make cookie decorating kid-friendly?
Use sturdy cookie shapes, a few icing colors, parchment mats, ramekins of sprinkles, and spread-and-sprinkle tools for younger kids. Older kids can try marbling or simple piping. Keep toothpicks, tiny decorations, and hot drinks supervised so the setup stays age-appropriate.
How do I keep cookie decorating from getting messy?
Use parchment sheets, rimmed baking sheets, ramekins, tabletop trash bins, wipes, and a separate drying rack zone. Give each guest a defined workspace and keep refills small. Visible cleanup supplies help guests manage crumbs, icing snips, sprinkle spills, and sticky hands as they go.
What drinks go with a cookie decorating party?
Hot chocolate, coffee, tea, milk, gingerbread lattes, and simple zero-proof drinks all work well. Keep drinks away from wet cookies and icing bags. A separate hot drink station lets guests refill without crowding the decorating table.
How do guests take decorated cookies home?
Use flat bakery boxes, name labels, and parchment between layers once icing is dry enough. Keep boxes open until the last practical moment if cookies are still setting. For very wet cookies, send them home in a single layer so the designs are not damaged.
Final Thoughts
The best Christmas cookie decorating party ideas make room for the fun parts: choosing colors, adding sprinkles, practicing lines, taking photos, and carrying finished cookies home safely. Bake ahead, keep the tools focused, protect the table, build in drying time, and the party can feel festive without turning the kitchen into a full-day cleanup job.
Last update on 2026-09-18 / Affiliate links / Images from Amazon Product Advertising API